Quick Answer: Great skincare product photography requires mastering reflective and translucent surfaces, matching the brand's color science exactly, and creating texture cues that communicate quality through a screen. Brands that upgrade from DIY to professional beauty photography see conversion rate increases of 2-3x and return rates that drop significantly: because customers finally trust what they're buying (Shopify Plus, 2024).
The serum was gorgeous in person. Golden, slightly viscous, catching the afternoon light through the studio window like liquid jewelry. The founder held it up and said, "Just make it look like that."
Four hours later, after fighting reflections from the glass dropper bottle, color-correcting the liquid so it didn't read as orange on screen, and re-lighting the whole setup because the metallic cap was throwing a hot spot directly into my lens, I had the shot. It looked effortless. It was anything but.
That's skincare product photography in a sentence. The finished image looks simple: a beautiful bottle on a clean surface. But the technical path to get there is one of the most demanding in commercial product work, and the gap between amateur and professional is wider in beauty than almost any other category.
The global skincare market hit $187 billion in 2024 and is projected to reach $241 billion by 2028 (Statista). The beauty and cosmetics e-commerce segment alone is growing at 12% annually (McKinsey, 2024). That means more brands are launching every month, all competing for the same eyeballs on the same platforms: and the first thing a customer evaluates is your product image.
Not your ingredients list. Not your founder story. Your image.
I've spent years shooting beauty and skincare brands, from indie DTC serums to nationally distributed cosmetics lines. Here's everything I've learned about what makes beauty product photography work: and what kills conversions before a customer ever reads your product description.
Why Beauty Products Are the Hardest Category to Photograph
I've shot food, beverages, supplements, electronics, apparel, and just about every CPG category that exists. Beauty products are uniquely difficult for three overlapping reasons.
Reflective and Translucent Surfaces
Most skincare products come in glass or high-gloss plastic. That means you're dealing with reflections on every surface: and if the product contains a visible liquid (serums, oils, toners), you're also trying to light through the packaging to show the product inside.
This is a physics problem as much as an art problem. A matte cardboard box absorbs light and shows shape predictably. A glass serum bottle with a metallic cap does three things simultaneously: it reflects your light source, it refracts light through the liquid, and the cap throws specular highlights in unpredictable directions. You're essentially lighting three different materials in one object.
Most DIY attempts fail here immediately. The founder shoots on their iPhone with a ring light, and the bottle becomes a mirror reflecting a glowing circle back at the camera. The liquid looks murky. The cap is blown out. They post it anyway because the shoot took two hours and they're exhausted.
Color Accuracy Is Non-Negotiable
In food photography, if your red sauce reads slightly more orange on screen, nobody notices. In skincare, if your "Rose Gold" moisturizer reads as "Peach" on the website, you get returns and bad reviews.
Beauty consumers are extremely color-literate. They've spent years matching foundations, comparing lip shades, and evaluating undertones. When your product image doesn't match the physical product, they don't blame their monitor: they blame your brand.
This means beauty product photography requires rigorous color management: calibrated monitors, consistent white balance, color checker cards in every setup, and post-production that accounts for how different screens will render the file. I shoot tethered to a calibrated display for every beauty client because the margin for error is essentially zero.
Brand Aesthetic Has to Be Exact
A supplement brand might have loose brand guidelines: "clean, modern, white background." A beauty brand has a 40-page brand book specifying exact hex codes, shadow density, highlight placement, and the precise angle their logo should catch light.
I'm not exaggerating. I've received creative briefs from skincare brands that specified the exact gradient of the background shadow behind a moisturizer jar. Beauty brands understand that their visual identity IS their product: especially in a market where the actual formulations are often similar across competitors. The photography is doing the differentiation work.
This means a beauty product photographer isn't just technically skilled: they're essentially a brand interpreter, translating a visual identity into lighting decisions, surface choices, and post-production style.
The Essential Shot List for Skincare and Beauty Brands
After shooting for dozens of beauty brands, I've landed on a core shot list that covers what every skincare or cosmetics brand needs. You can add to this, but you shouldn't subtract from it.
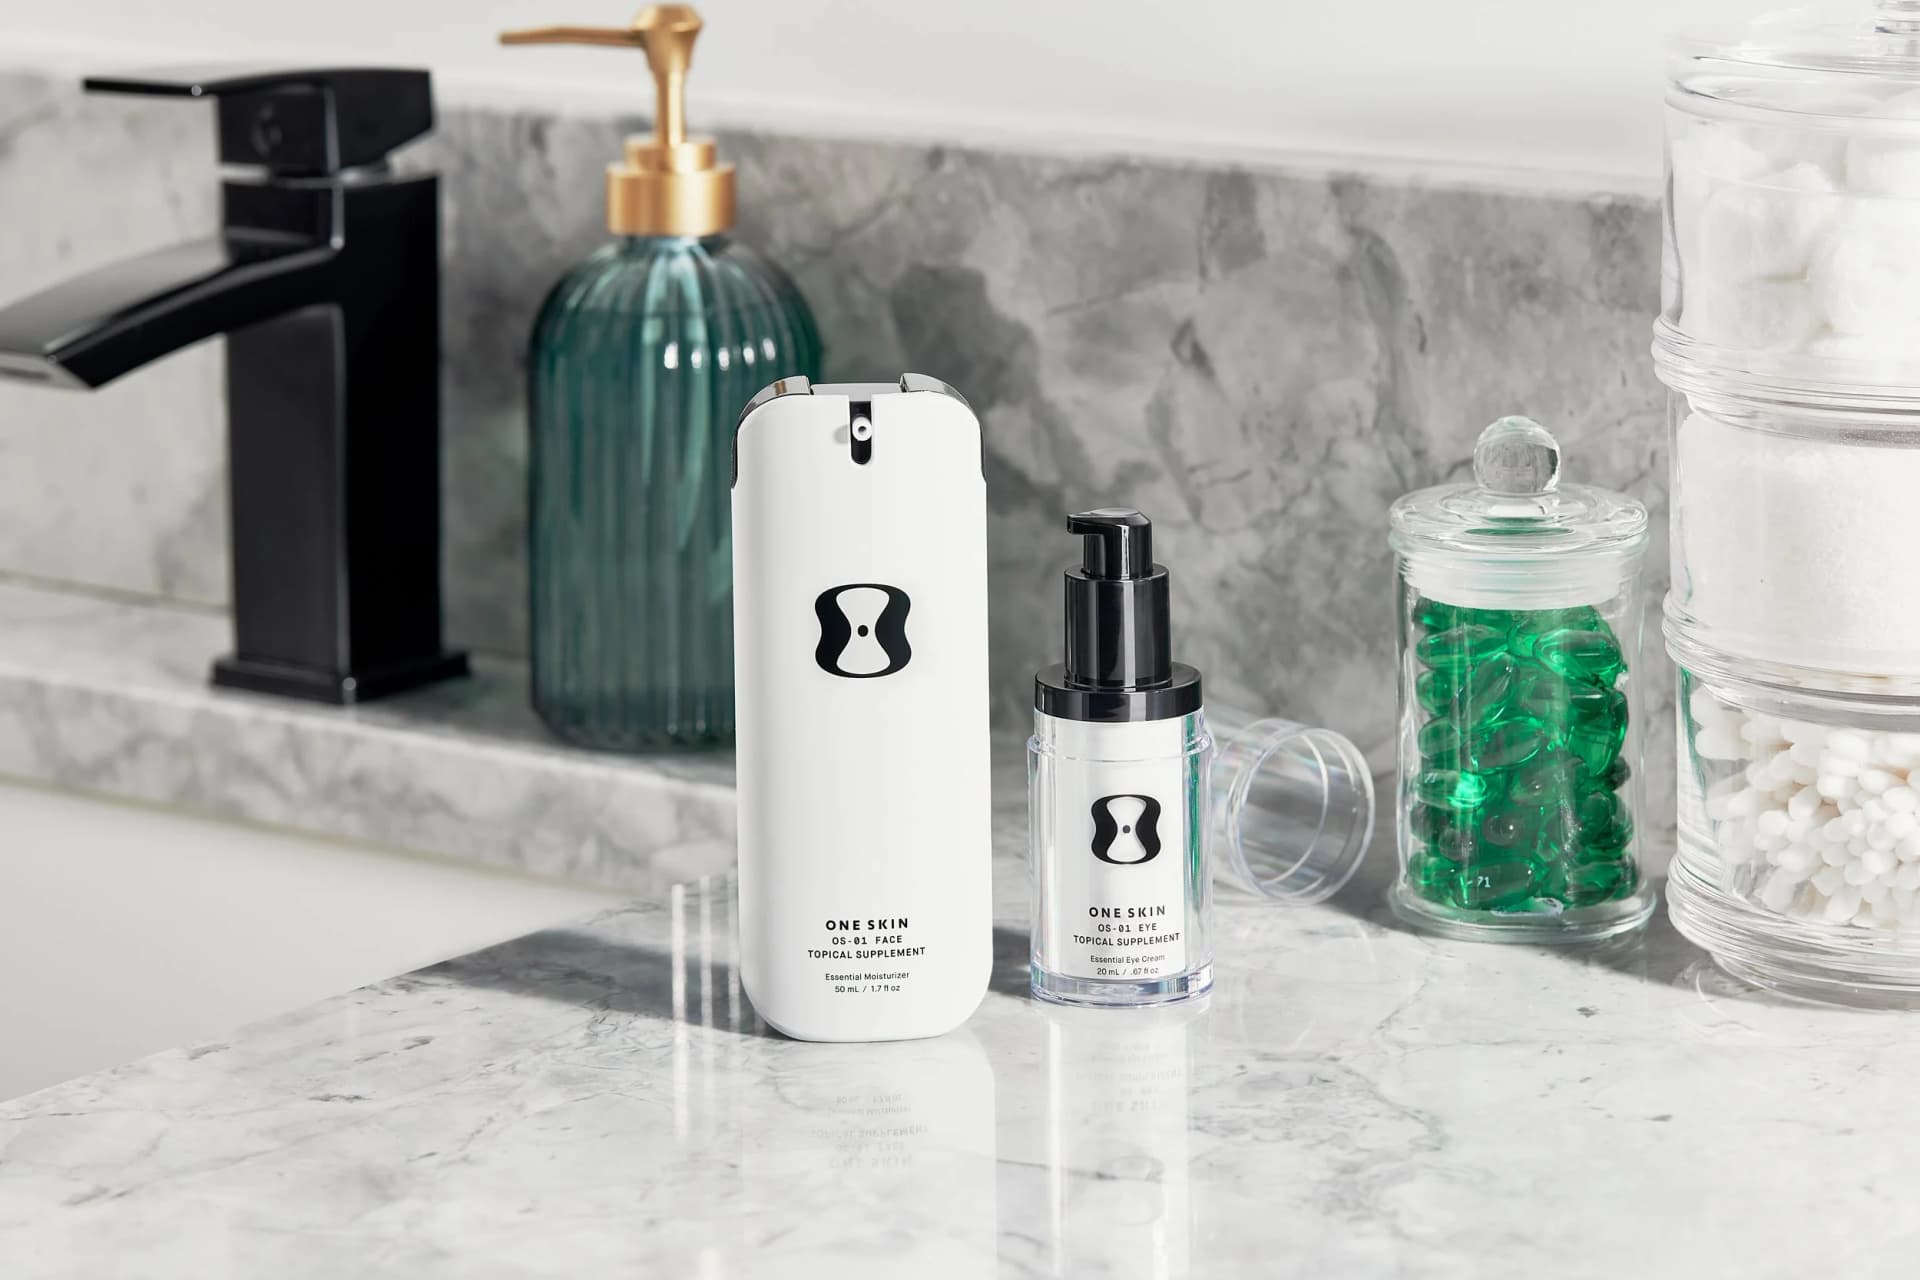
Hero Product Shot (White or Branded Background)
This is your Amazon main image, your Sephora listing, your website PDP hero. One product, clean background, technically perfect. For white background shots, the product needs to be properly isolated with consistent shadow treatment. For branded backgrounds, you're matching the brand's color palette exactly.
This shot looks simple and takes the longest to light correctly. Every reflection, every highlight, every shadow is intentional. I typically spend 30-45 minutes lighting a single skincare hero shot before I take the first frame.
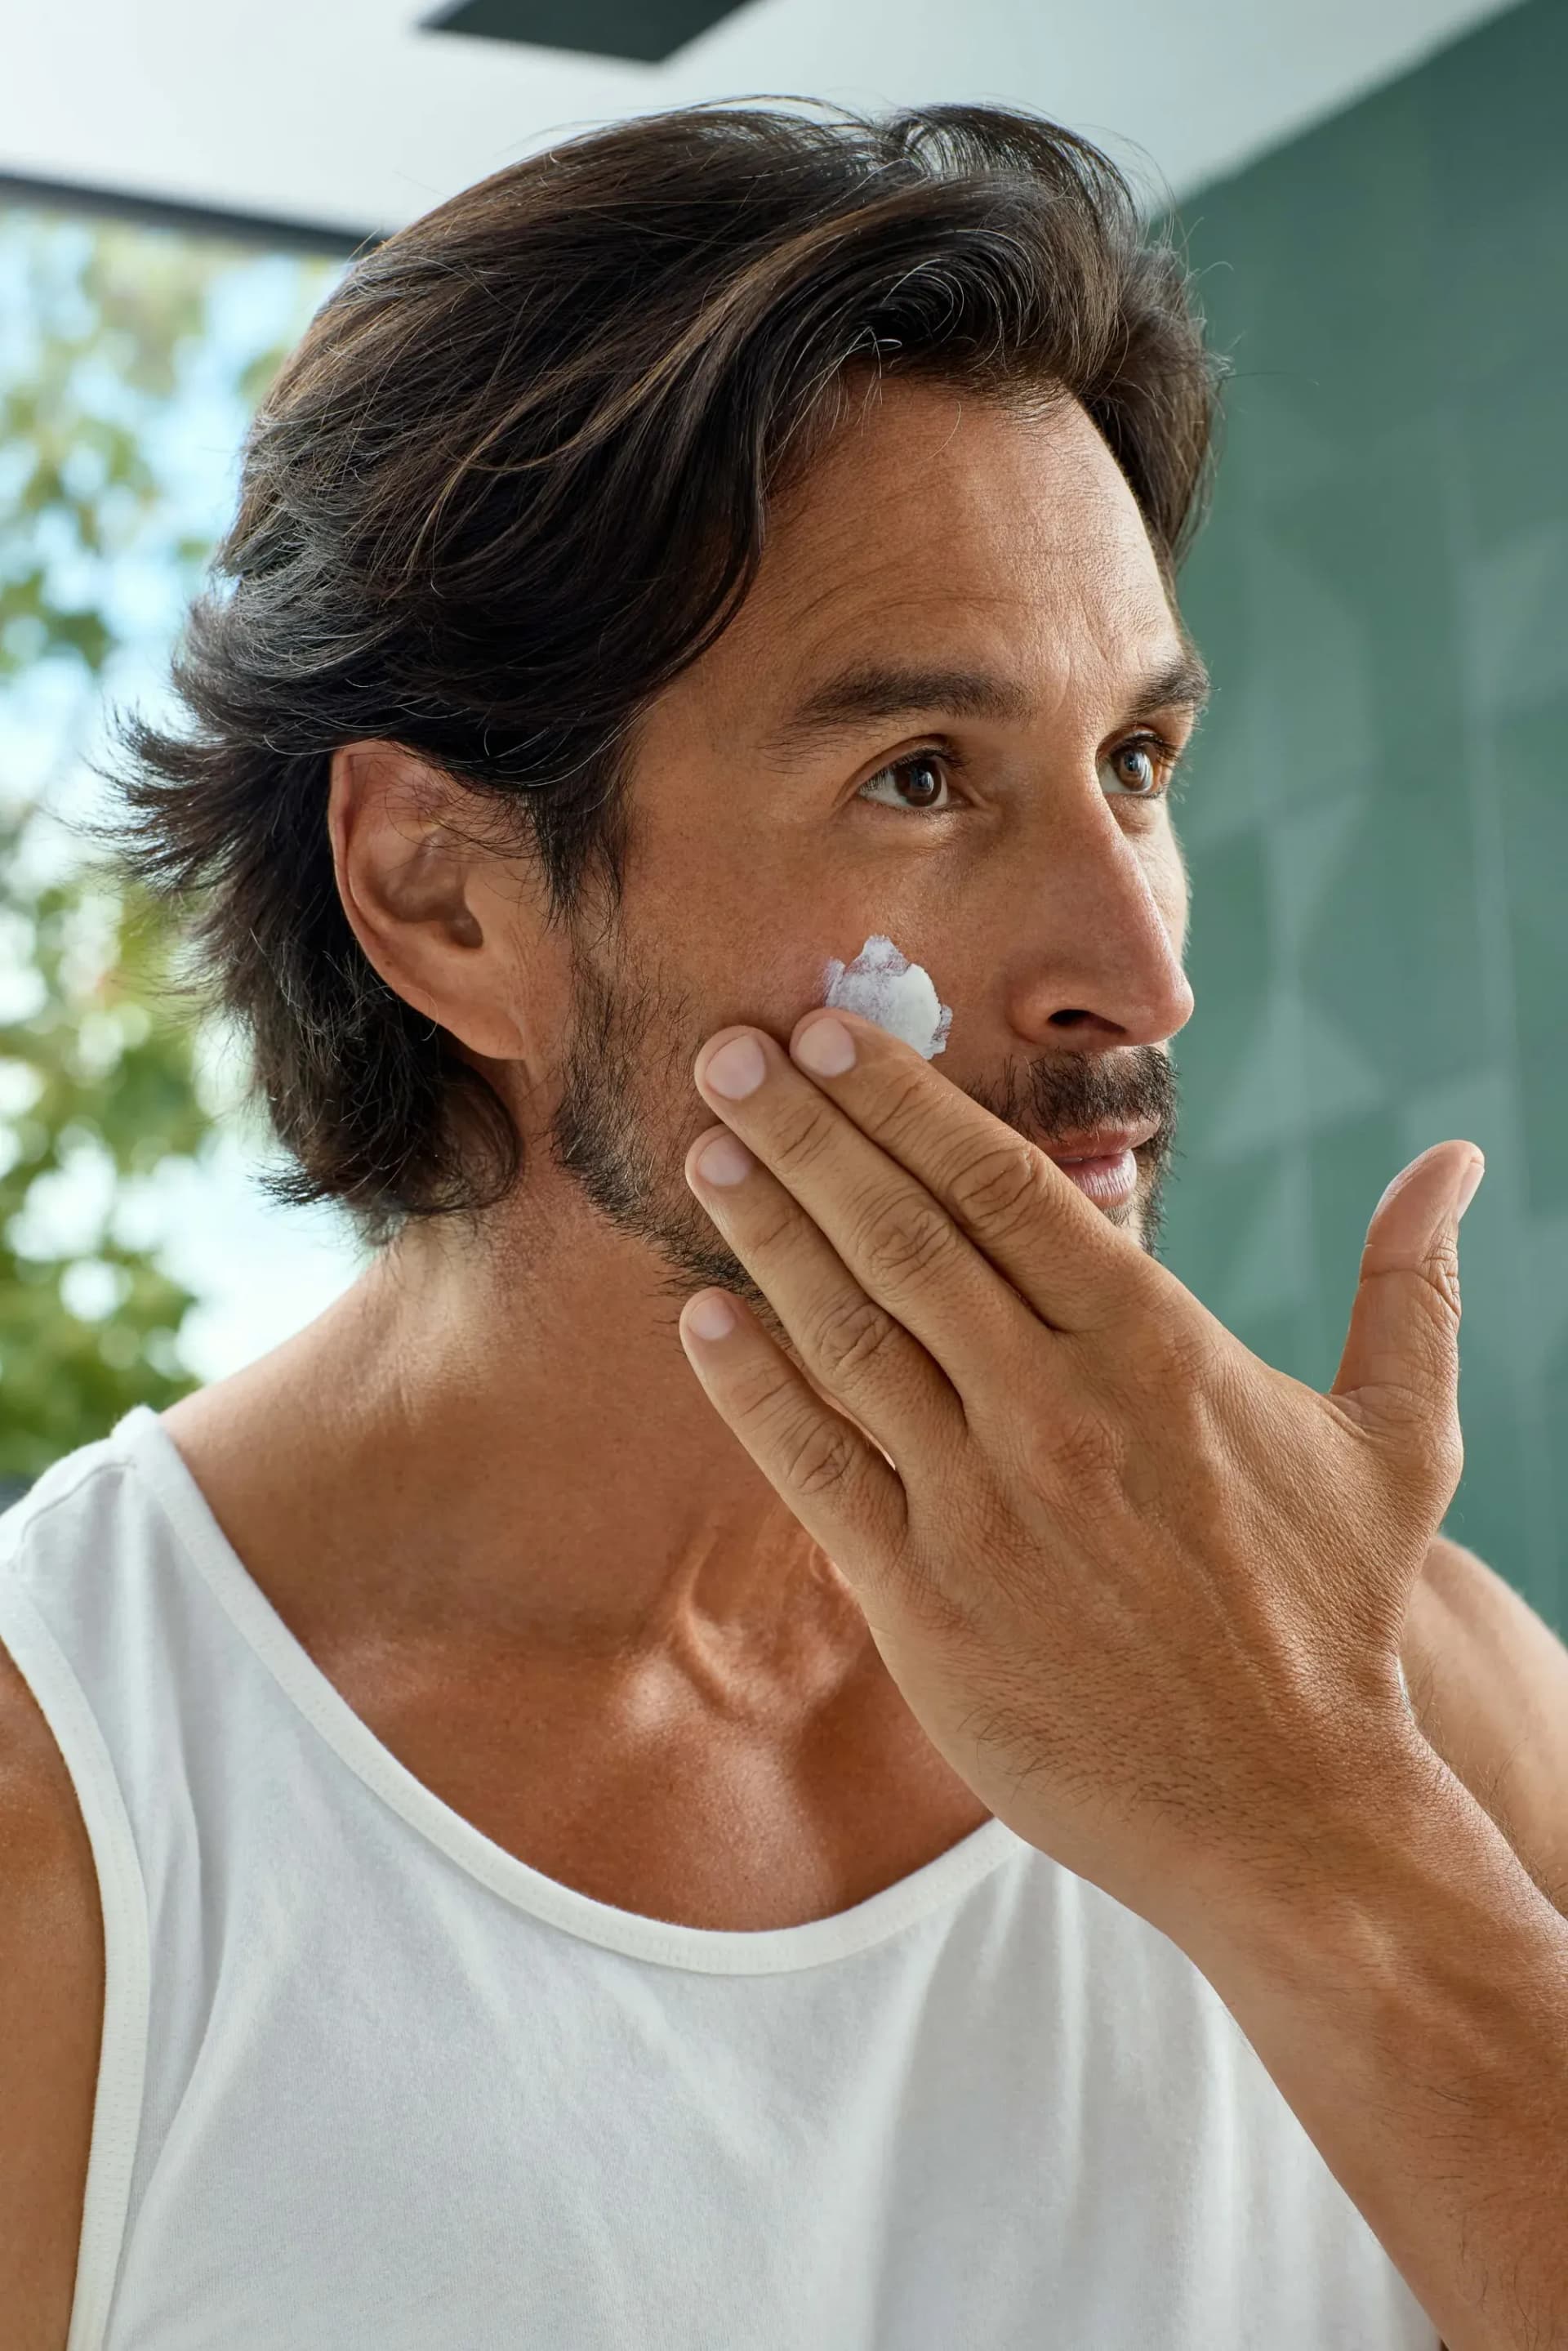
Texture and Detail Shots
These are the shots that sell. A macro of the serum's consistency as it drips from the dropper. The cream's texture swirled on a surface. The powder's pigment dusted across skin or stone.
Texture shots communicate quality in a way that a standard product shot can't. When a customer sees the actual consistency of your hyaluronic acid serum: viscous, clear, catching light: they understand the product physically. It bridges the gap between screen and reality.
Beauty brands that include texture shots in their product listings see 27% higher engagement rates compared to listings with standard product shots alone (Salsify, 2024).
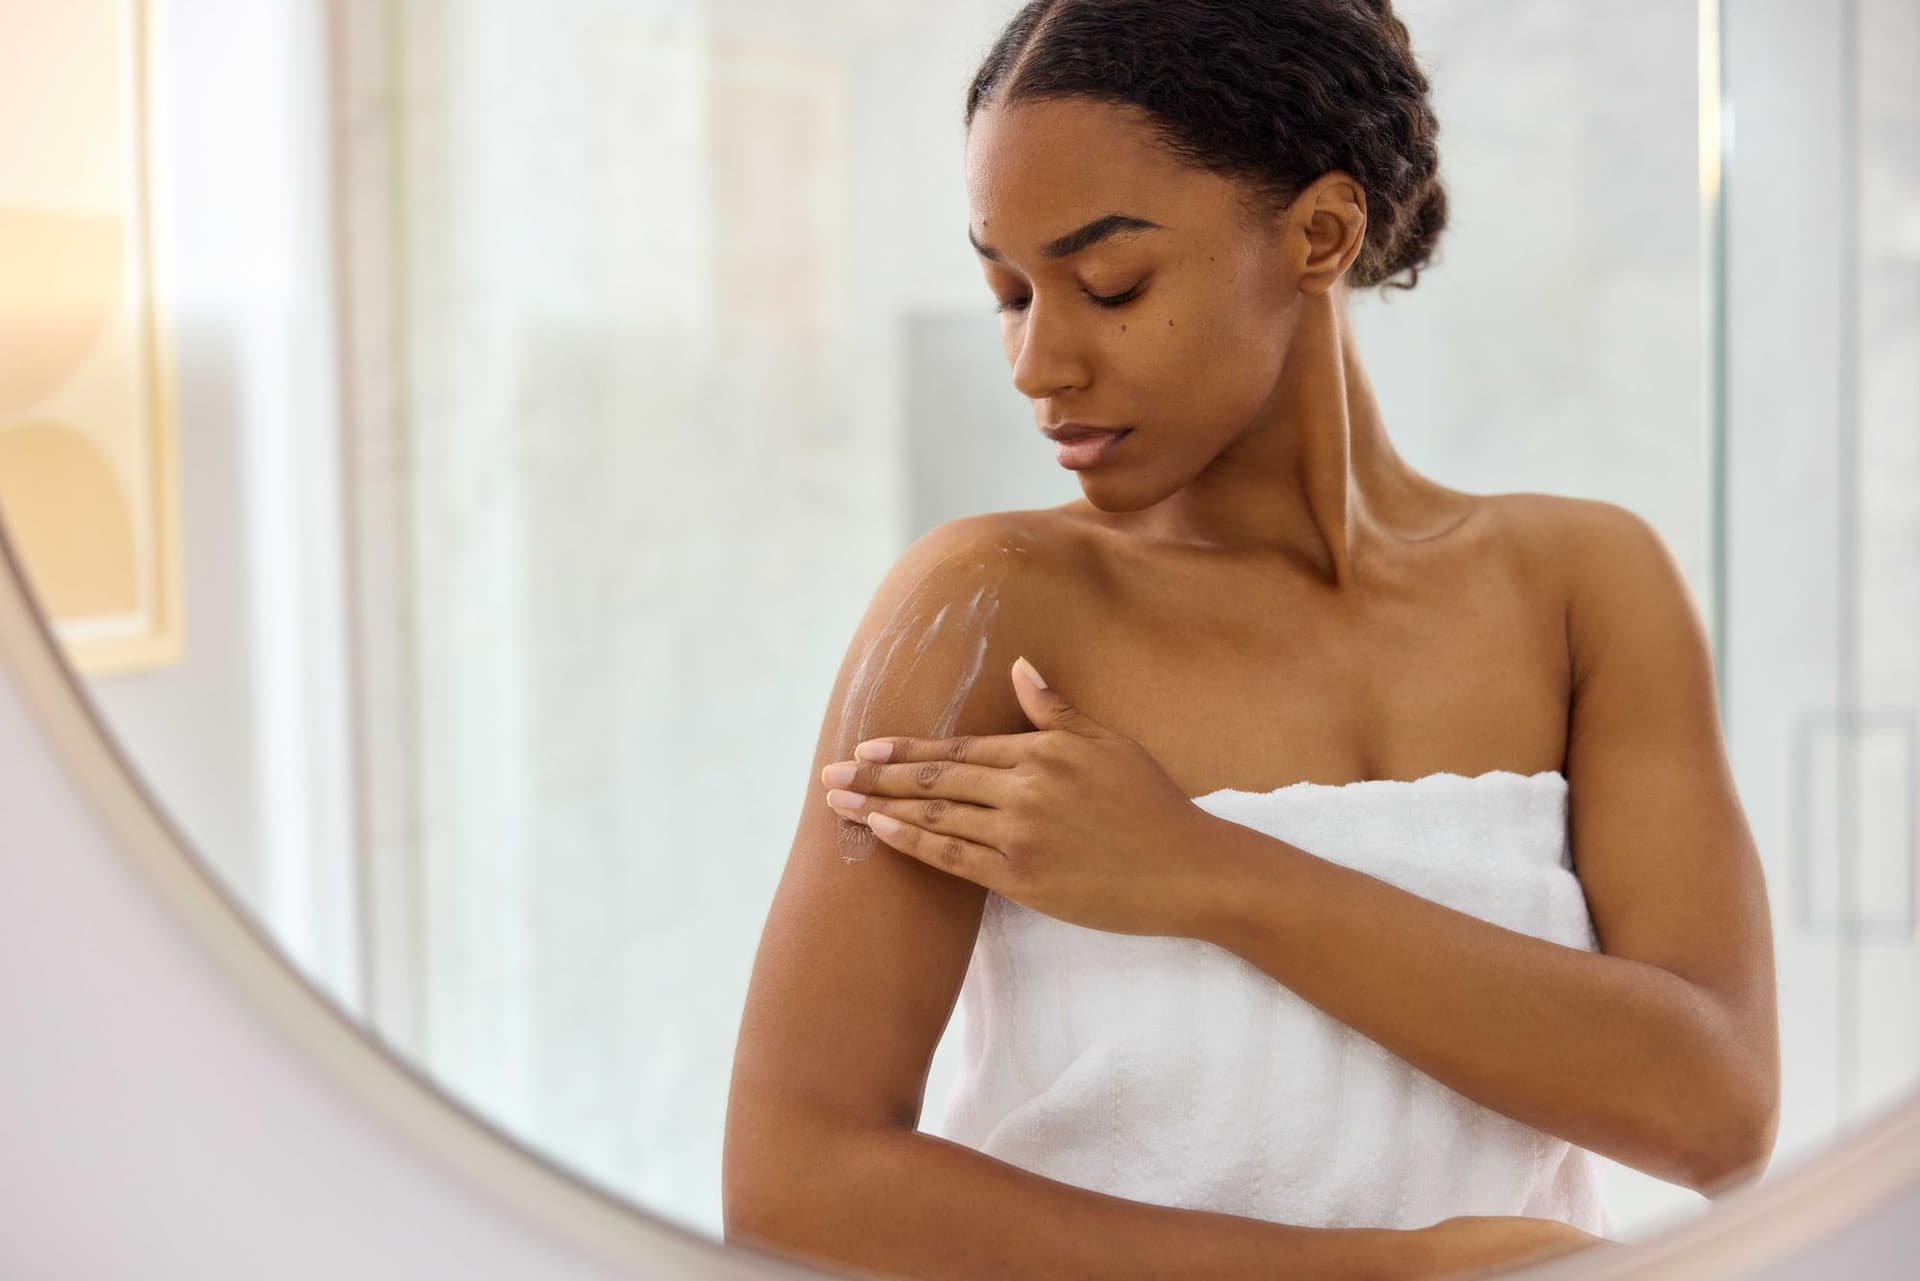
Lifestyle and Context Shots
Your serum on a marble bathroom shelf next to a plant. Your lip color applied on a model. Your moisturizer in a morning routine flat lay.
These shots answer the question every customer is subconsciously asking: "Does this product belong in MY life?" Lifestyle shots place your product in an aspirational but believable context. They're what populates your Instagram, your email campaigns, your homepage.
Ingredient and Story Shots
A cleanser surrounded by the botanicals in its formula. A vitamin C serum next to fresh oranges and turmeric. These shots are increasingly important as consumers want transparency about what's in their products.
67% of skincare consumers say they research ingredients before purchasing (NielsenIQ, 2024). Ingredient shots make that research visual and reinforce your product's story.
Group and Collection Shots
If you sell a line: cleanser, toner, serum, moisturizer: you need them composed together in a way that communicates system and routine. This is harder than it sounds because you're now managing reflections and color accuracy across 4-6 products simultaneously, all with different surface properties.
Lighting Techniques That Make or Break Beauty Photography
Lighting is where beauty photography separates from general product photography. The principles are different because the materials are different.
Soft, Diffused Key Light
Hard light is the enemy of skincare photography. It creates harsh reflections on glass, blows out metallic caps, and makes every surface imperfection on packaging visible. I use large softboxes: typically 4x6 feet or larger: positioned to create broad, even illumination with soft gradients on reflective surfaces.
The key is distance and diffusion. A softbox two feet from a glass bottle still creates a defined reflection. Move it back to six feet and add a secondary diffusion panel, and that reflection becomes a gentle gradient that wraps around the bottle and actually shows its shape.
Strip Lights for Edge Definition
Beauty products need edge definition to pop off the background. I use narrow strip lights on either side of the product, positioned to create thin highlight lines along the edges of bottles and jars. These edge highlights are what make a product look three-dimensional on a flat screen.
Getting strip light placement right on a curved glass surface is one of those things that separates experienced beauty photographers from beginners. Move the strip light half an inch and the highlight jumps from the edge to the face of the bottle: and suddenly you have a hot spot instead of definition.
Backlighting for Translucent Products
Serums, oils, toners, and any product in clear packaging benefit enormously from backlighting. A light placed behind the product, flagged so it doesn't hit the lens directly, illuminates the liquid from within and shows its color and clarity.
This is how you make a hyaluronic acid serum look like liquid glass instead of a cloudy bottle of who-knows-what. The backlight does the selling. But it has to be balanced carefully with the key light, or you get a silhouette instead of a product shot.
Controlling Reflections With Flags and Cards
In beauty photography, I spend as much time blocking light as directing it. Black cards (flags) positioned on either side of a reflective bottle create the dark gradients that give the product shape. White cards bounce fill light into shadow areas. V-flats: large folding cards: create controlled environments around the product.
I've had shoots where the product itself took 10 minutes to position and the light-shaping cards took 45 minutes. That's normal for beauty work. You're essentially building a custom light environment for each product.
Common Mistakes in Beauty Product Photography
Mistake 1: Using a Ring Light
Ring lights are great for face makeup tutorials. They're terrible for product photography. They create a distinctive circular reflection in every glass or glossy surface, they provide zero directional control, and they flatten dimension. If I see a ring light reflection in a product image, I immediately know it was shot by someone who doesn't specialize in product work.
Mistake 2: Over-Retouching
Beauty brands sometimes want every reflection removed, every surface made perfectly uniform, every label digitally straightened. The result looks like a 3D render, not a photograph. Consumers can sense this: an over-retouched product image triggers the same distrust as an over-filtered selfie.
Retouching should clean up dust, correct minor imperfections, and ensure color accuracy. It shouldn't make the product look like it doesn't exist in physical space.
Mistake 3: Ignoring Label Readability
Your product name and key claims need to be legible in the final image: especially at thumbnail size. I've seen beautiful beauty shots where the label is angled away, in shadow, or so small in the composition that you can't read a single word. Your product name is your brand awareness. Make sure the camera can read it.
Mistake 4: Inconsistent Color Across SKUs
If you sell a line of products and each one was shot on a different day with different lighting, the colors of your packaging will shift between images. When a customer views your collection page and sees five products that look like they were photographed in five different studios, it undermines the perception of a cohesive brand.
I shoot entire product lines in a single session whenever possible, with the same lighting, same background, and same color management. Consistency is invisible when it's done right and painfully obvious when it's not.
Mistake 5: Skipping the Lifestyle Shots
Too many skincare brands launch with white-background product shots only. Those are essential for marketplaces and PDPs, but they're not what drives social media engagement, email click-through, or brand storytelling. Budget for both.
How to Photograph Specific Beauty Product Types
Glass Bottles and Droppers (Serums, Oils)
These are the most technically challenging. Use backlighting to illuminate the liquid, soft key light to manage reflections on the glass, and black flags to create edge definition. Shoot the dropper separately if you want to show the liquid mid-drip: getting a clean drip shot with the bottle in focus simultaneously is extremely difficult and often composited in post.
Jars and Tubs (Moisturizers, Masks)
Open jars showing product texture are money shots for moisturizers. Use a small spatula or palette knife to create an appealing swirl pattern on the surface. Light from a high angle to catch the texture of the cream. If the jar is glass, treat it like any reflective surface. If it's matte, you have more flexibility with lighting angles.
Tubes (Cleansers, Primers, SPF)
Tubes need support to stand upright and often have a tendency to show every crease and dent. Steam or warm the tube slightly to smooth minor imperfections before shooting. Light from slightly above to show the shape of the tube without creating harsh shadows on the cap.
Palettes and Compacts (Color Cosmetics)
Color accuracy is critical here. Shoot swatches separately on skin or paper, lit with a color-temperature-matched light source. Use a polarizing filter to cut glare on pressed powders: without it, the shimmer in the product creates hot spots that obscure the actual color.
Lipstick and Lip Products
Bullet lipstick shots are classics of beauty photography. Use a macro lens to capture the bullet's shape and texture. The twist-up should be clean and consistent: I've spent 15 minutes getting a lipstick bullet to the exact right height. These products are small, so every millimeter matters in the composition.
Working With Beauty Brands: What to Expect
Creative Direction Is Detailed
Beauty clients come with references, mood boards, and specific expectations. This is good: it means they know their brand. Be prepared for multiple rounds of review and understand that color matching will be the most scrutinized element of the approval process.
SKU Counts Are High
A skincare line might have 15-30 SKUs. A color cosmetics brand might have 200+ when you count every shade. Plan your shoot for efficiency: light the setup once, then cycle through products. Group products by packaging type so you're not rebuilding the lighting for every SKU.
Seasonal and Launch Cycles Drive Timelines
Beauty brands operate on seasonal launch cycles, and photography timelines are tight. It's common to receive products two weeks before launch and need final images delivered in five business days. Build a workflow that can handle fast turnaround without sacrificing quality.
DIY vs. Professional: Where to Draw the Line
If you're a skincare brand doing under $10K/month in revenue, you can get started with DIY. Buy a lightbox, learn basic lighting, shoot your products on white, and get them listed. It won't be great, but it'll be functional.
Once you cross $10K/month: or if you're launching into retail, pitching to Sephora or Ulta, or running paid social campaigns: professional photography pays for itself immediately. The conversion rate difference between amateur and professional beauty photography is typically 2-3x (BigCommerce, 2024). On a product with a $45 AOV, that math gets very compelling very fast.
Professional beauty photography typically costs $150-500 per product for e-commerce shots and $2,000-8,000 for a full lifestyle and campaign session, depending on complexity and model usage. Compare that to the cost of running ads to a product page with mediocre images: you're burning ad spend to send traffic to a page that can't convert.
What We Deliver for Beauty Brands
At 51st & Eighth, we shoot skincare, cosmetics, and beauty products for DTC brands and e-commerce companies. Our approach is simple: we light obsessively, manage color precisely, and deliver images that match your brand standards while performing on whatever platform you're selling on.
Every beauty shoot includes: - Tethered shooting with calibrated color management - Custom lighting for each product type in your line - Full retouching with brand-matched color correction - Web-optimized and print-ready deliverables - Lifestyle and texture shots that give you content beyond the PDP
If you're a beauty or skincare brand that needs product photography that actually converts, let's talk. I'd rather spend 30 minutes understanding your brand and building a shot list that works than watch you burn another quarter on images that don't perform.
Final Thoughts
Skincare and beauty product photography isn't just about making pretty pictures of pretty products. It's about solving a set of technical challenges: reflective surfaces, translucent materials, precise color matching: in a way that serves the brand's identity and drives measurable business results.
The brands that win in beauty e-commerce aren't necessarily the ones with the best formulations. They're the ones whose product images make you feel something before you've read a single word. That feeling is what professional beauty photography creates: and it's why the investment pays back every time a customer hits "Add to Cart."