Quick Answer: Outdoor product photography produces some of the highest-converting lifestyle imagery for beverage, CPG, and apparel brands: but it requires far more planning than studio work. The difference between amateur outdoor shots and professional ones comes down to light management, surface selection, wind mitigation, and shooting within tight timing windows. Budget 2-3x the prep time you'd spend on a comparable studio session.
Last spring, a sparkling water brand flew us out to shoot their new summer line on a lakeside dock outside Austin. The creative brief was simple: golden light, water reflections, condensation on the cans, effortless summer energy. The kind of image that makes someone stop scrolling and think, "I want to be there."
What the brand didn't see was the 45 minutes we spent clamping a diffusion panel to a C-stand because a 15 mph crosswind kept catching it like a sail. Or the spray bottle we refilled eleven times because Texas humidity in May evaporates fake condensation in about 90 seconds. Or the fact that we had exactly 22 minutes of usable golden-hour light before the sun dropped behind a tree line nobody scouted on Google Earth.
The final images looked effortless. The shoot was anything but.
That's the fundamental tension of outdoor product photography. The images sell a feeling of ease and naturalness, but producing them demands more technical rigor than most studio sessions. And with 72% of consumers saying product imagery is the most influential factor in their purchase decisions (Salsify, 2025), and lifestyle-context images outperforming plain white-background shots by 40% in A/B conversion tests (Shopify Plus, 2024), the demand for outdoor product photography has surged across DTC and CPG brands.
Here's everything I've learned shooting products outside for the last eight years: the stuff that doesn't make it into the behind-the-scenes reels.
Why Brands Want Outdoor Product Photography (And Why They're Right)
The shift toward outdoor and natural-setting product imagery isn't just aesthetic preference. It's driven by measurable performance data.
The Conversion Case
Studio product photography on white backgrounds remains essential for e-commerce listings: Amazon requires it, and it's the standard for primary product images on most platforms. But for hero images, social media, advertising, and brand storytelling, outdoor lifestyle photography consistently outperforms.
A 2025 analysis by Nosto found that product pages featuring at least one lifestyle/contextual image alongside standard studio shots saw 29% higher add-to-cart rates than pages with studio-only imagery. For beverage brands specifically, the lift was even higher: 37%: because context (a picnic table, a cooler, a beach towel) triggers associative desire that a white-background can shot simply cannot.
Social media performance tells a similar story. Beverage and CPG brands report 2.1x higher engagement rates on Instagram posts featuring outdoor lifestyle photography versus studio-lit product shots (Later, 2025 Social Media Benchmark Report). The algorithm rewards content that looks native to the feed, and outdoor imagery reads as organic content rather than advertising.
The Brand Positioning Case
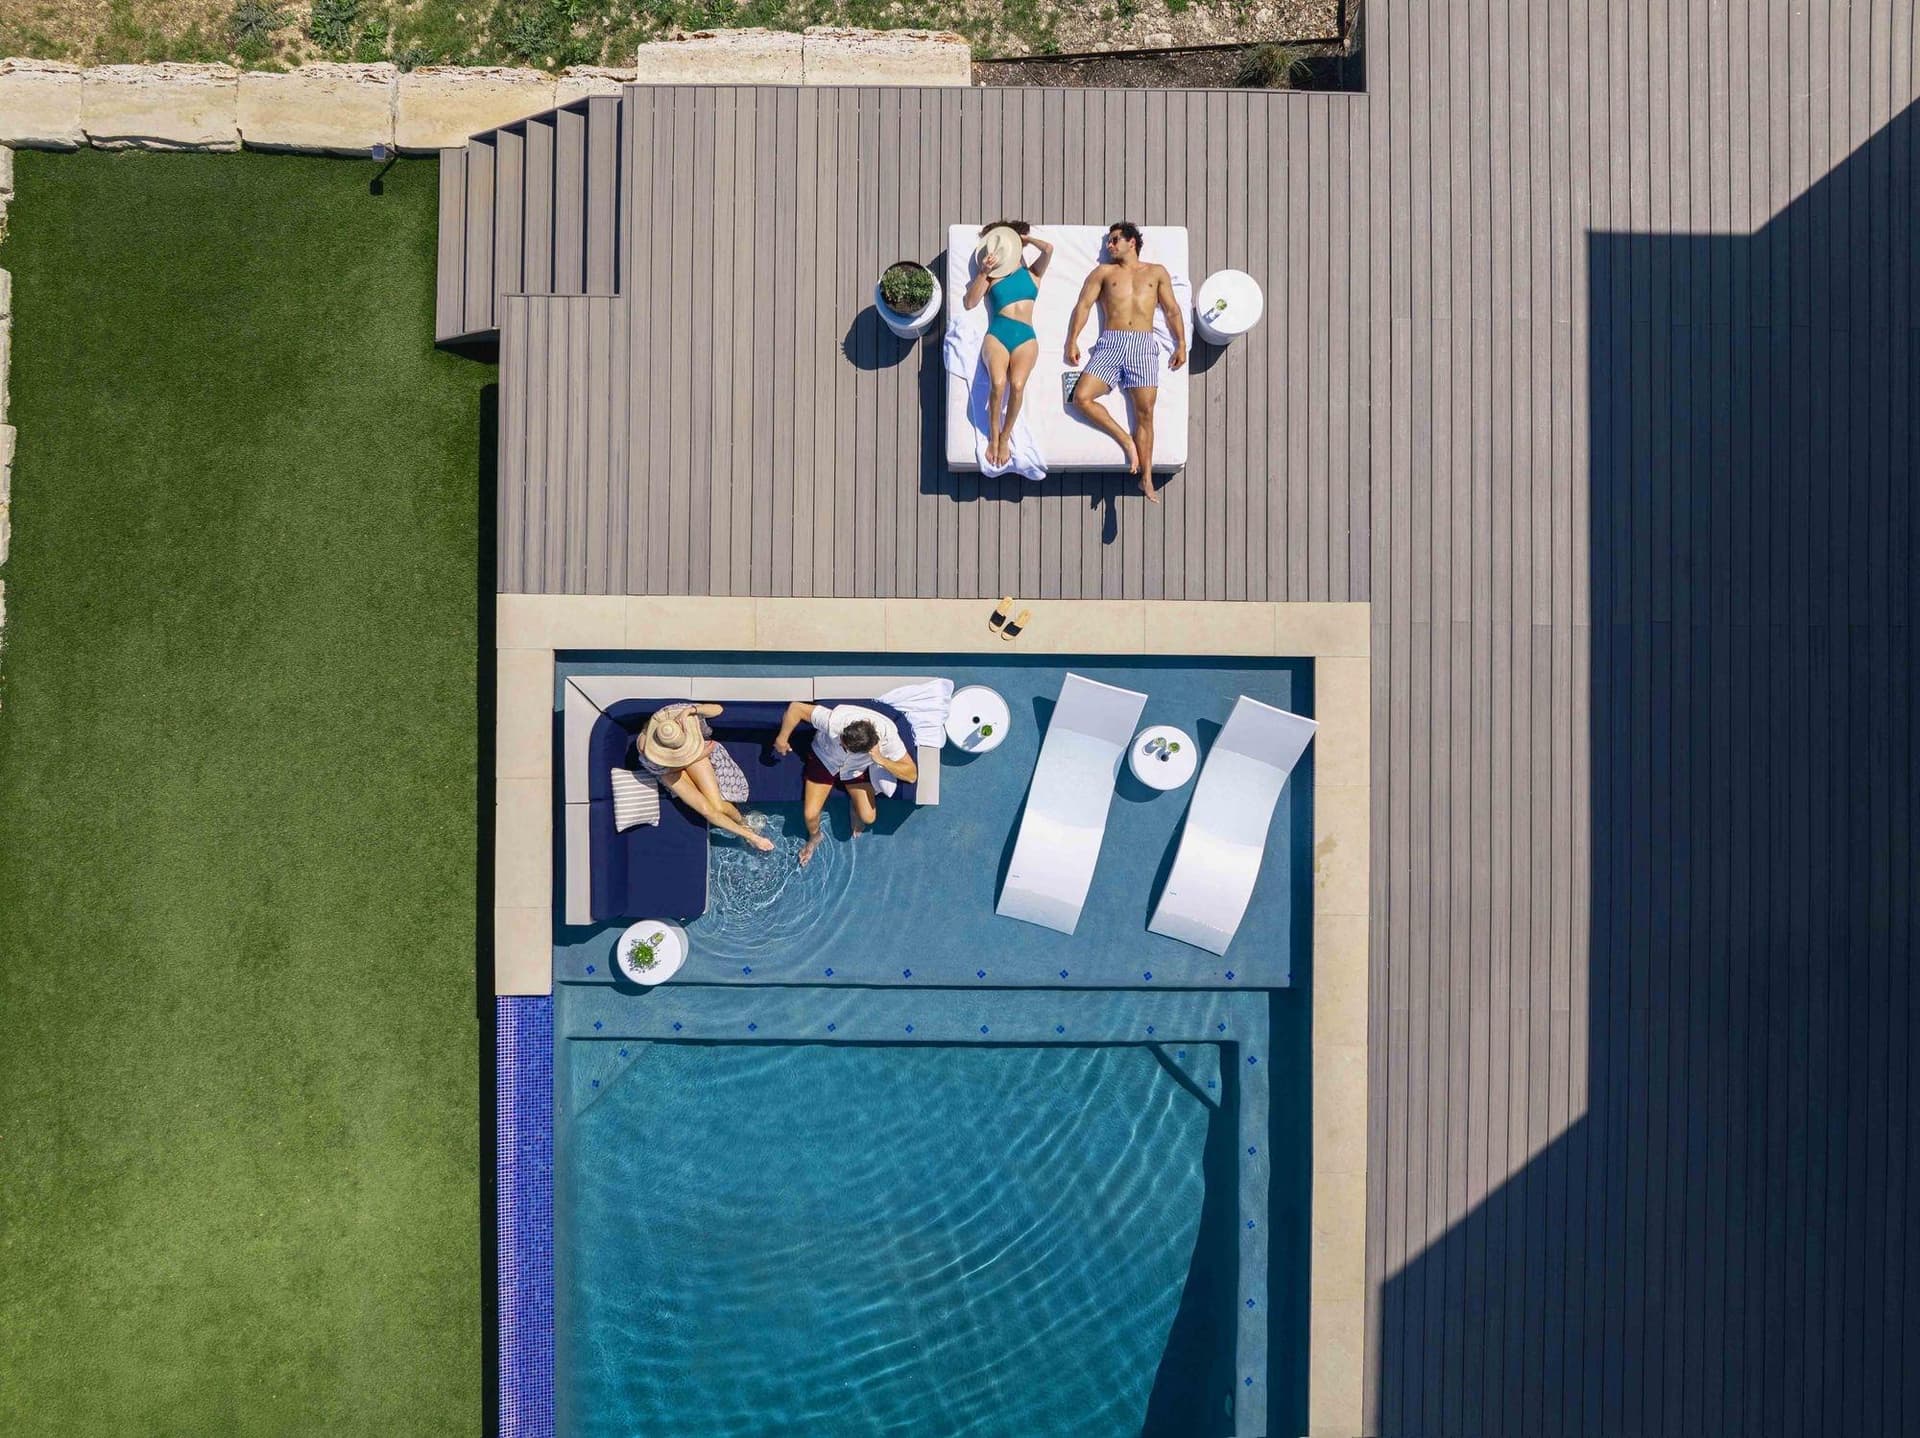
Beyond raw conversion metrics, outdoor product photography communicates something specific about a brand's identity. It says: this product belongs in your life, not just in a warehouse. For categories like craft beverages, natural skincare, outdoor apparel, and artisan food products, that positioning is essential.
When a customer sees a bottle of hot sauce on a white background, they evaluate the label. When they see that same bottle on a weathered cutting board next to freshly grilled corn with visible char marks and a lime wedge: they imagine a moment. And moments sell products.
Natural Light Product Photography: Reading the Sky Like a Light Meter
The single biggest variable in outdoor product photography is light. In a studio, you control everything: power, angle, color temperature, modifier shape. Outside, you're negotiating with the sun.
The Golden Windows
Most professional outdoor product shoots happen during two windows:
Morning golden hour (sunrise + 45 minutes). Lower humidity, calmer wind, warmer light with a slight cool undertone. Best for food and beverage products where you want warmth without the heavy amber cast of evening light. In Austin, this window runs roughly 6:45-7:30 AM in summer and 7:15-8:00 AM in winter.
Evening golden hour (sunset - 60 minutes through sunset). Richer amber tones, longer shadows, more dramatic light quality. Better for fashion/apparel and lifestyle-forward CPG brands. The light changes faster in this window: you lose about one stop of exposure every 8-10 minutes in the final 30 minutes: so you need to work efficiently.
Overcast Days Are Not the Enemy
New photographers assume sunny days are ideal for outdoor product shots. Experienced photographers know overcast skies are often better.
Cloud cover acts as a massive natural softbox. It eliminates harsh shadows, reduces specular highlights on glossy packaging, and creates even illumination that's far more forgiving for product detail. Overcast light is especially valuable for:
- Textured products (fabric, leather, artisan food) where even lighting reveals surface detail
- Reflective packaging (glass bottles, metallic cans) where direct sun creates blown-out hot spots
- Multi-product flat lays where consistent exposure across the entire frame matters
The tradeoff is mood. Overcast light is flatter and cooler. It lacks the drama of golden hour. For brands with a warm, energetic visual identity, you'll likely need to add warmth in post-production or supplement with a reflector to create directional contrast.
Managing Harsh Midday Sun
Sometimes the schedule doesn't give you a choice. The location is only available at noon. The talent is booked for a 1 PM call time. The client wants "bright and sunny" and means it literally.
Shooting products in direct midday sun is the hardest outdoor lighting scenario, but it's manageable with the right tools:
Diffusion overhead. A 6x6 or 8x8 foot frame with 1/2 or 1-stop diffusion fabric positioned above the product softens direct sun into workable light. This is the single most useful grip tool for outdoor product photography. Budget $200-400 for a quality frame and fabric kit.
Negative fill. In bright sun, bounce light from the ground and surrounding surfaces fills shadows too much, making everything look flat. Black foam core or a black fabric flag placed opposite the sun side of the product restores shadow definition and dimensionality.
Scrim positioning. Angle matters more than you'd think. A diffusion frame directly overhead creates soft but directionless light. Tilting the scrim 15-20 degrees toward the sun side maintains a subtle directionality that keeps the product looking three-dimensional.
Surface Selection: The Background Decisions That Make or Break the Shot
After light, the surface your product sits on is the most impactful creative decision in outdoor product photography. And it's where most brands and less experienced photographers underinvest their planning.
Natural Surfaces
Weathered wood. The go-to surface for craft beverages, artisan food, and rustic-positioned brands. Look for genuine weathered wood rather than faux-distressed surfaces: real patina has irregular grain patterns and color variation that reads as authentic on camera. Salvage yards and architectural reclamation shops in Austin (I like Southern Accents and Austin Salvage) are goldmines for textured wood surfaces.
Stone and concrete. Best for premium positioning: spirits, high-end skincare, minimalist brands. Smooth concrete creates a gallery-like feel. Rough-cut limestone reads as organic luxury. Avoid overly porous stone that competes with label detail.
Live greenery and foliage. Ferns, moss, eucalyptus branches, and seasonal flowers work beautifully as framing elements, but they wilt fast in direct sun. Mist them with water every 10-15 minutes. Bring more than you think you need: you'll cycle through fresh pieces as earlier ones curl.
Brought-In Surfaces
Many "outdoor" product shots actually use portable surfaces brought to the location. This gives you environmental context (natural light, visible landscape in the background) with controlled foreground:
- Marble and tile slabs (12x12 to 24x24 inch pieces from tile shops, $5-30 each)
- Linen and canvas textiles (wrinkle them intentionally: overly smooth fabric looks staged)
- Vintage trays, cutting boards, and serving ware (thrift stores, not Target)
The key principle: the surface should feel like it belongs in the environment. A polished marble slab on a forest floor looks absurd. A weathered cutting board on a patio table looks inevitable.
Wind: The Invisible Wrecking Ball
Studio photographers don't think about wind. Outdoor product photographers think about it constantly. Even a gentle 8-10 mph breeze can:
- Knock over lightweight products (boxes, bags, tubes)
- Shift props between frames, ruining consistency
- Move fabric backgrounds and styling elements
- Vibrate diffusion panels and reflectors, creating inconsistent light
- Blow dust and debris onto wet or sticky product surfaces
Wind Mitigation Kit
Every outdoor product shoot should include:
- Museum putty or mounting wax: invisible adhesive that secures products to surfaces without visible residue. I use Quake Hold. Costs $5 and saves entire shoots.
- Sandbags (4-6 minimum): for C-stands, light stands, and frame legs. Wind catches grip equipment like sails.
- A-clamps in multiple sizes: for securing fabrics, diffusion, and backdrop materials.
- Gaffer tape: obviously.
- A wind-monitoring app: I use Windy. Check hourly wind forecasts for your exact location, not just the city-level weather report. Microclimates matter. A downtown Austin rooftop might have 5 mph gusts while a Zilker Park location two miles away gets 15 mph.
When to Call It
If sustained winds exceed 20 mph, you're fighting physics. Diffusion frames become dangerous (a 6x6 frame in high wind can injure someone or destroy equipment), lightweight products won't stay positioned, and you'll spend more time resetting than shooting. Reschedule. No image is worth a C-stand to the face.
The Condensation Problem (Beverage Brands, Read This)
Every beverage brand wants condensation on the bottle or can. That dewy, just-pulled-from-the-cooler look that triggers thirst. In a studio, this is straightforward: glycerin and water mixture, applied with a spray bottle, holds for 20-30 minutes under controlled conditions.
Outdoors, condensation is a war of attrition.
What Kills Fake Condensation
- Heat. Above 85 degrees F, water-glycerin mixtures evaporate in 3-5 minutes.
- Wind. Moving air accelerates evaporation dramatically.
- Direct sun. Heats the product surface, preventing droplets from forming naturally and evaporating applied moisture faster.
Professional Workarounds
Dulling spray first. Before applying condensation, hit the bottle or can with a light coat of Krylon Dulling Spray. This kills specular reflections from direct sun AND gives water droplets something to cling to. It washes off completely with warm water after the shoot.
Glycerin ratio adjustment. Studio standard is roughly 50/50 glycerin to water. For outdoor shoots in warm conditions, increase to 70/30 glycerin. The higher viscosity resists evaporation significantly longer.
Real ice, real cooler. For hero shots, sometimes the best move is to actually chill the product in an ice bath for 30 minutes before shooting. Real condensation from genuine temperature differential looks different from sprayed-on moisture: the droplets are smaller, more uniform, and form naturally along the curves of the container. You get about 4-6 minutes of shootable condensation before it evaporates in warm outdoor conditions, so have your composition and exposure dialed before you pull the product from the cooler.
Spray and shoot immediately. Assign someone: an assistant, a brand rep, anyone with steady hands: as the dedicated spray person. They apply condensation, step out of frame, and you fire immediately. Reapply every 2-3 minutes in warm conditions. This is not a "spray once and shoot for 20 minutes" situation.
Location Scouting for Outdoor Product Shoots
Location scouting for outdoor product photography is different from scouting for portrait or architectural work. You're evaluating backgrounds, surfaces, light patterns, and logistical factors through the lens of small-object photography.
What to Evaluate
Background separation. Products are small. They need visual breathing room. Look for locations where the background falls off into soft bokeh at reasonable working distances: open fields behind a styled surface, water, distant treelines. Busy backgrounds with sharp detail at similar focal distances compete with the product.
Sun path. Use an app like Sun Surveyor or PhotoPills to model the exact sun position at your planned shoot time. A location that looks perfect at 10 AM might have harsh shadows from an adjacent building at 2 PM. I've lost usable locations to shadows I didn't anticipate because I scouted at the wrong time of day.
Access and logistics. Can you get grip equipment to the spot? Is there parking within reasonable carry distance? Are there power outlets nearby if you need to run a fan, steamer, or tethered laptop? Shooting on a beautiful remote hilltop loses its appeal when you're hauling 200 pounds of gear up a trail.
Permits and permissions. Public parks in Austin require permits for commercial photography. Zilker Park, Lady Bird Lake trails, and most city parks fall under Austin Parks and Recreation permitting. The fee is modest ($50-150 typically), but getting caught without one can shut down your shoot. Private property requires written permission from the owner. Get it in writing. Always.
Post-Production for Outdoor Product Images
Outdoor product images typically require more post-production work than studio equivalents because you're correcting for environmental variables rather than working with fully controlled conditions.
Standard Outdoor Post-Production Workflow
1. White balance correction. Outdoor color temperature shifts constantly. Even within a 30-minute golden hour window, you might see a 500-800K color temperature swing. Shoot RAW (always), and batch-correct white balance in Lightroom or Capture One using a gray card reference shot from each lighting condition.
2. Shadow and highlight recovery. Outdoor lighting has higher dynamic range than studio lighting. You'll frequently need to lift shadows and pull highlights to get product detail into a printable/displayable range.
3. Selective color grading. Product colors need to be accurate for e-commerce use, but the overall mood of the image might benefit from a warmer or cooler grade. Use HSL adjustments and masking to keep product colors accurate while adjusting environmental tones for mood.
4. Cleanup. Outdoor environments introduce debris, insects, stray leaves, and imperfections that weren't visible on a 3-inch camera LCD. Budget time for clone stamp and healing brush work.
5. Composite elements when necessary. Sometimes the best sky, the best product exposure, and the best foreground don't coexist in a single frame. Professional outdoor product photography regularly involves compositing 2-3 exposures for optimal dynamic range, or replacing a blown-out sky with one captured at a different exposure.
Gear Essentials for Outdoor Product Photography
You don't need a different camera for outdoor product work, but you need different support gear.
The Non-Negotiable Outdoor Kit
- Polarizing filter. Reduces glare on reflective packaging, deepens sky tones, cuts haze. A quality circular polarizer ($80-150) is the single most impactful optical accessory for outdoor product work.
- Diffusion frame (6x6 minimum). As discussed above, this is your portable softbox.
- Reflectors (silver and white). 42-inch 5-in-1 collapsible reflectors are fine for product scale. Silver for punch, white for subtle fill.
- Macro or close-macro lens. A 90-105mm macro lens gives you tight product detail with beautiful background separation. If you don't want a dedicated macro, a 70-200mm f/2.8 with close-focus capability covers most outdoor product scenarios.
- Portable battery-powered strobe. For balancing flash with ambient light, particularly in backlit scenarios. The Godox AD200 or AD300 Pro are workhorses for this application. Use flash to fill the product face while natural light handles the background mood.
- Sturdy tripod with low-angle capability. Outdoor product shots frequently use low camera angles. A tripod that can drop to 6-12 inches off the ground (center column inversion or no center column) is essential.
Budgeting Outdoor Product Photography
Outdoor product shoots cost more than equivalent studio sessions. This surprises brands who assume "natural" means "simpler."
Why Outdoor Costs More
- Location fees and permits ($50-500 depending on the location)
- Additional grip and lighting equipment rental ($150-400/day for frames, stands, sandbags)
- Weather contingency days: you need a backup date in the contract, and that date costs the photographer opportunity income
- Extended post-production (20-40% more editing time than studio equivalents)
- Higher assistant/crew needs (someone needs to hold that reflector, carry that sandbag, spray that condensation)
Typical Rate Ranges (2026)
For professional outdoor product photography:
- Half-day shoot (4 hours, 15-25 final images): $2,000-4,500
- Full-day shoot (8 hours, 30-50 final images): $3,500-8,000
- Multi-day campaign (2-3 days, 75-150 final images): $7,000-18,000
These ranges reflect Austin and mid-tier US markets. NYC and LA rates run 30-50% higher. Rural markets run 20-30% lower.
Making the Call: When to Shoot Products Outside vs. In Studio
Not every product benefits from outdoor photography. The decision should be strategic, not aesthetic.
Shoot outside when: - Your brand identity is tied to nature, outdoor activity, or a specific environment - You need hero/lifestyle images for social media, advertising, or brand storytelling - The product's use case is inherently outdoor (beverages, sunscreen, outdoor apparel, camping gear) - You want to differentiate from competitors who only show studio shots
Stay in studio when: - You need primary e-commerce listing images (white background, 360-degree, detail shots) - Product color accuracy is critical and non-negotiable (cosmetics color matching, paint samples) - The product has no natural outdoor context (software packaging, medical devices, industrial components) - Budget is limited and you need maximum output per dollar
The strongest product photography programs do both. Studio shots for the listing page, outdoor lifestyle shots for the brand story. One feeds conversion. The other feeds desire. You need both.
Frequently Asked Questions
How do you keep products clean during outdoor shoots? Bring microfiber cloths, compressed air, and lens cleaning solution. Clean the product before every setup change. Dust, pollen, and fingerprints show up mercilessly in close-up product photography, and outdoor environments introduce far more contaminants than a controlled studio.
What's the best time of year for outdoor product photography in Austin? October through early December and late February through April offer the best combination of mild temperatures, manageable humidity, and reliable golden-hour light. Summer (June-August) is brutal: heat damages products, melts adhesives on props, and limits comfortable shooting to early morning windows. January can work but cloud cover is unpredictable.
Can I shoot outdoor product photography with a phone? For social media content, yes: modern phone cameras handle outdoor light well. For e-commerce hero images, advertising, or print, no. You need RAW capture, precise depth-of-field control, and tethered shooting capability that phones don't offer. The gap is closing, but it's not closed.
How many final images should I expect from a full-day outdoor shoot? Plan for 30-50 final retouched images from an 8-hour outdoor day, depending on the number of products and setups. That's lower than studio output (which might yield 50-80) because outdoor shoots involve more setup time, more environmental troubleshooting, and more unusable frames from variable conditions.
Do I need a permit to shoot product photography in Austin parks? Yes. Any commercial photography in Austin public parks requires a permit from Austin Parks and Recreation. The process is straightforward and fees are reasonable, but lead time is typically 2-3 weeks. Private property (restaurants, ranches, rooftops) requires written permission from the property owner but no city permit.
How do you handle weather cancellations? Every outdoor product photography contract should include a weather contingency clause specifying a backup date within 7-14 days, conditions that trigger rescheduling (rain, sustained winds above 20 mph, extreme heat advisories), and how rescheduling costs are handled. Most professional photographers build one contingency day into their outdoor shoot pricing.
51st & Eighth is a commercial photography studio based in Austin, Texas, specializing in product, brand, and lifestyle photography for DTC and CPG brands. We shoot products in studio and on location across Texas and nationwide. [See our product photography work](/work) or [get in touch about your next shoot](/contact).