Quick Answer: Great food photography requires soft directional light (side or backlight), working in narrow time windows before ice melts and produce wilts, and strategic minimal styling that enhances without distracting. For restaurants: prioritize the 8–12 hero dishes that define your brand before photographing your full menu.
There's a reason food photography is one of the most specialized niches in commercial photography. Food is notoriously difficult to photograph well: it changes as you work with it, lighting requirements are exact, and customers have incredibly high expectations.
If you're a restaurant owner, food brand, or beverage company, you've likely experienced the frustration: you know your product tastes amazing, but your photos make it look mediocre. You've tried shooting with your smartphone, but the colors look off and the food looks flat. You've hired a general photographer, but they didn't understand how to style food or work quickly before everything wilts or melts.
Here's what makes food photography different: you're not just photographing an object, you're trying to communicate flavor, texture, freshness, and appetite appeal through a two-dimensional image. It's part science, part art, and entirely dependent on understanding both photography technique and culinary presentation.
Research from OpenTable found that restaurants with professional menu photography receive 70% more online orders than those without. DoorDash's own merchant data shows that restaurants with high-quality photos for 60% or more of their menu items see a 25% higher average order value. For food brands on retail shelves, Nielsen reports that packaging and product imagery influences 64% of purchase decisions at the point of sale.
At our Austin studio, we've photographed everything from craft cocktails to barbecue platters, artisan coffee to fine dining tasting menus. We work with restaurants building their visual brand, food companies launching new products, and beverage brands creating social media content that actually drives sales.
This guide breaks down the techniques, tips, and strategies we use to create food and beverage photography that makes customers hungry: and ready to buy.
Why Food Photography Is Different (and Why It Matters)
Food photography has unique challenges that don't exist in other product categories.
Time Is Your Enemy
Unlike shooting apparel or electronics, you can't take your time with food. Ice melts. Lettuce wilts. Sauces congeal. Beverages lose their condensation. You have a narrow window to capture the product at its peak.
This is why professional food photographers work with a fully styled and lit setup before the food even enters the frame. We prepare everything, take test shots with stand-ins, dial in the exposure and composition, and then work quickly once the real dish arrives.
Lighting Makes or Breaks the Shot
Food is all about texture and depth. Flat lighting makes food look lifeless. Harsh lighting creates unappetizing shadows. You need lighting that:
- Highlights texture (the crust on bread, the glisten on a sauce)
- Creates dimension without harsh shadows
- Maintains accurate color (especially important for fresh ingredients)
- Feels natural and inviting
In most cases, this means soft, directional light: often from the side or back to create depth and highlight texture.
Styling Is a Skill Unto Itself
Food styling is the art of making food look its absolute best for the camera. This often means:
- Strategic placement of ingredients to show variety and freshness
- Using tweezers to adjust individual elements
- Adding oil or water to create shine and freshness
- Choosing plates, backgrounds, and props that complement without distracting
Professional food stylists spend years learning which techniques work and which make food look artificial. The goal is to enhance natural appeal, not create something that looks fake.
Lighting Techniques for Food Photography
Let's start with the technical foundation: lighting. Here are the setups we use most often at our studio.
Natural Window Light (The Classic Approach)
Natural light is the gold standard for food photography because it's soft, flattering, and feels authentic. Here's how to use it effectively:
Setup: - Position your food 3-6 feet from a large window - Shoot during mid-morning or mid-afternoon (avoid harsh midday sun) - Use a white foam board or reflector on the opposite side to fill shadows
Best for: - Restaurant menu photography - Social media content - Casual, approachable food styling
Challenges: - Weather-dependent (cloudy days are actually ideal) - Limited shooting hours - Inconsistent color temperature throughout the day
Side Lighting with Strobes
When we need full control and consistency, we use artificial lighting with softboxes or umbrellas positioned to the side of the food.
Setup: - Main light at 45-90 degrees to the side - Diffused through a softbox or shoot-through umbrella - White reflector on the opposite side to control shadows - Optional rim light from behind to highlight edges and create separation
Best for: - Product packaging shots - Commercial campaigns - Consistent brand photography across multiple dishes
Advantages: - Complete control over intensity and direction - Consistent results regardless of time of day - Faster workflow for high-volume shoots
Backlighting for Drama
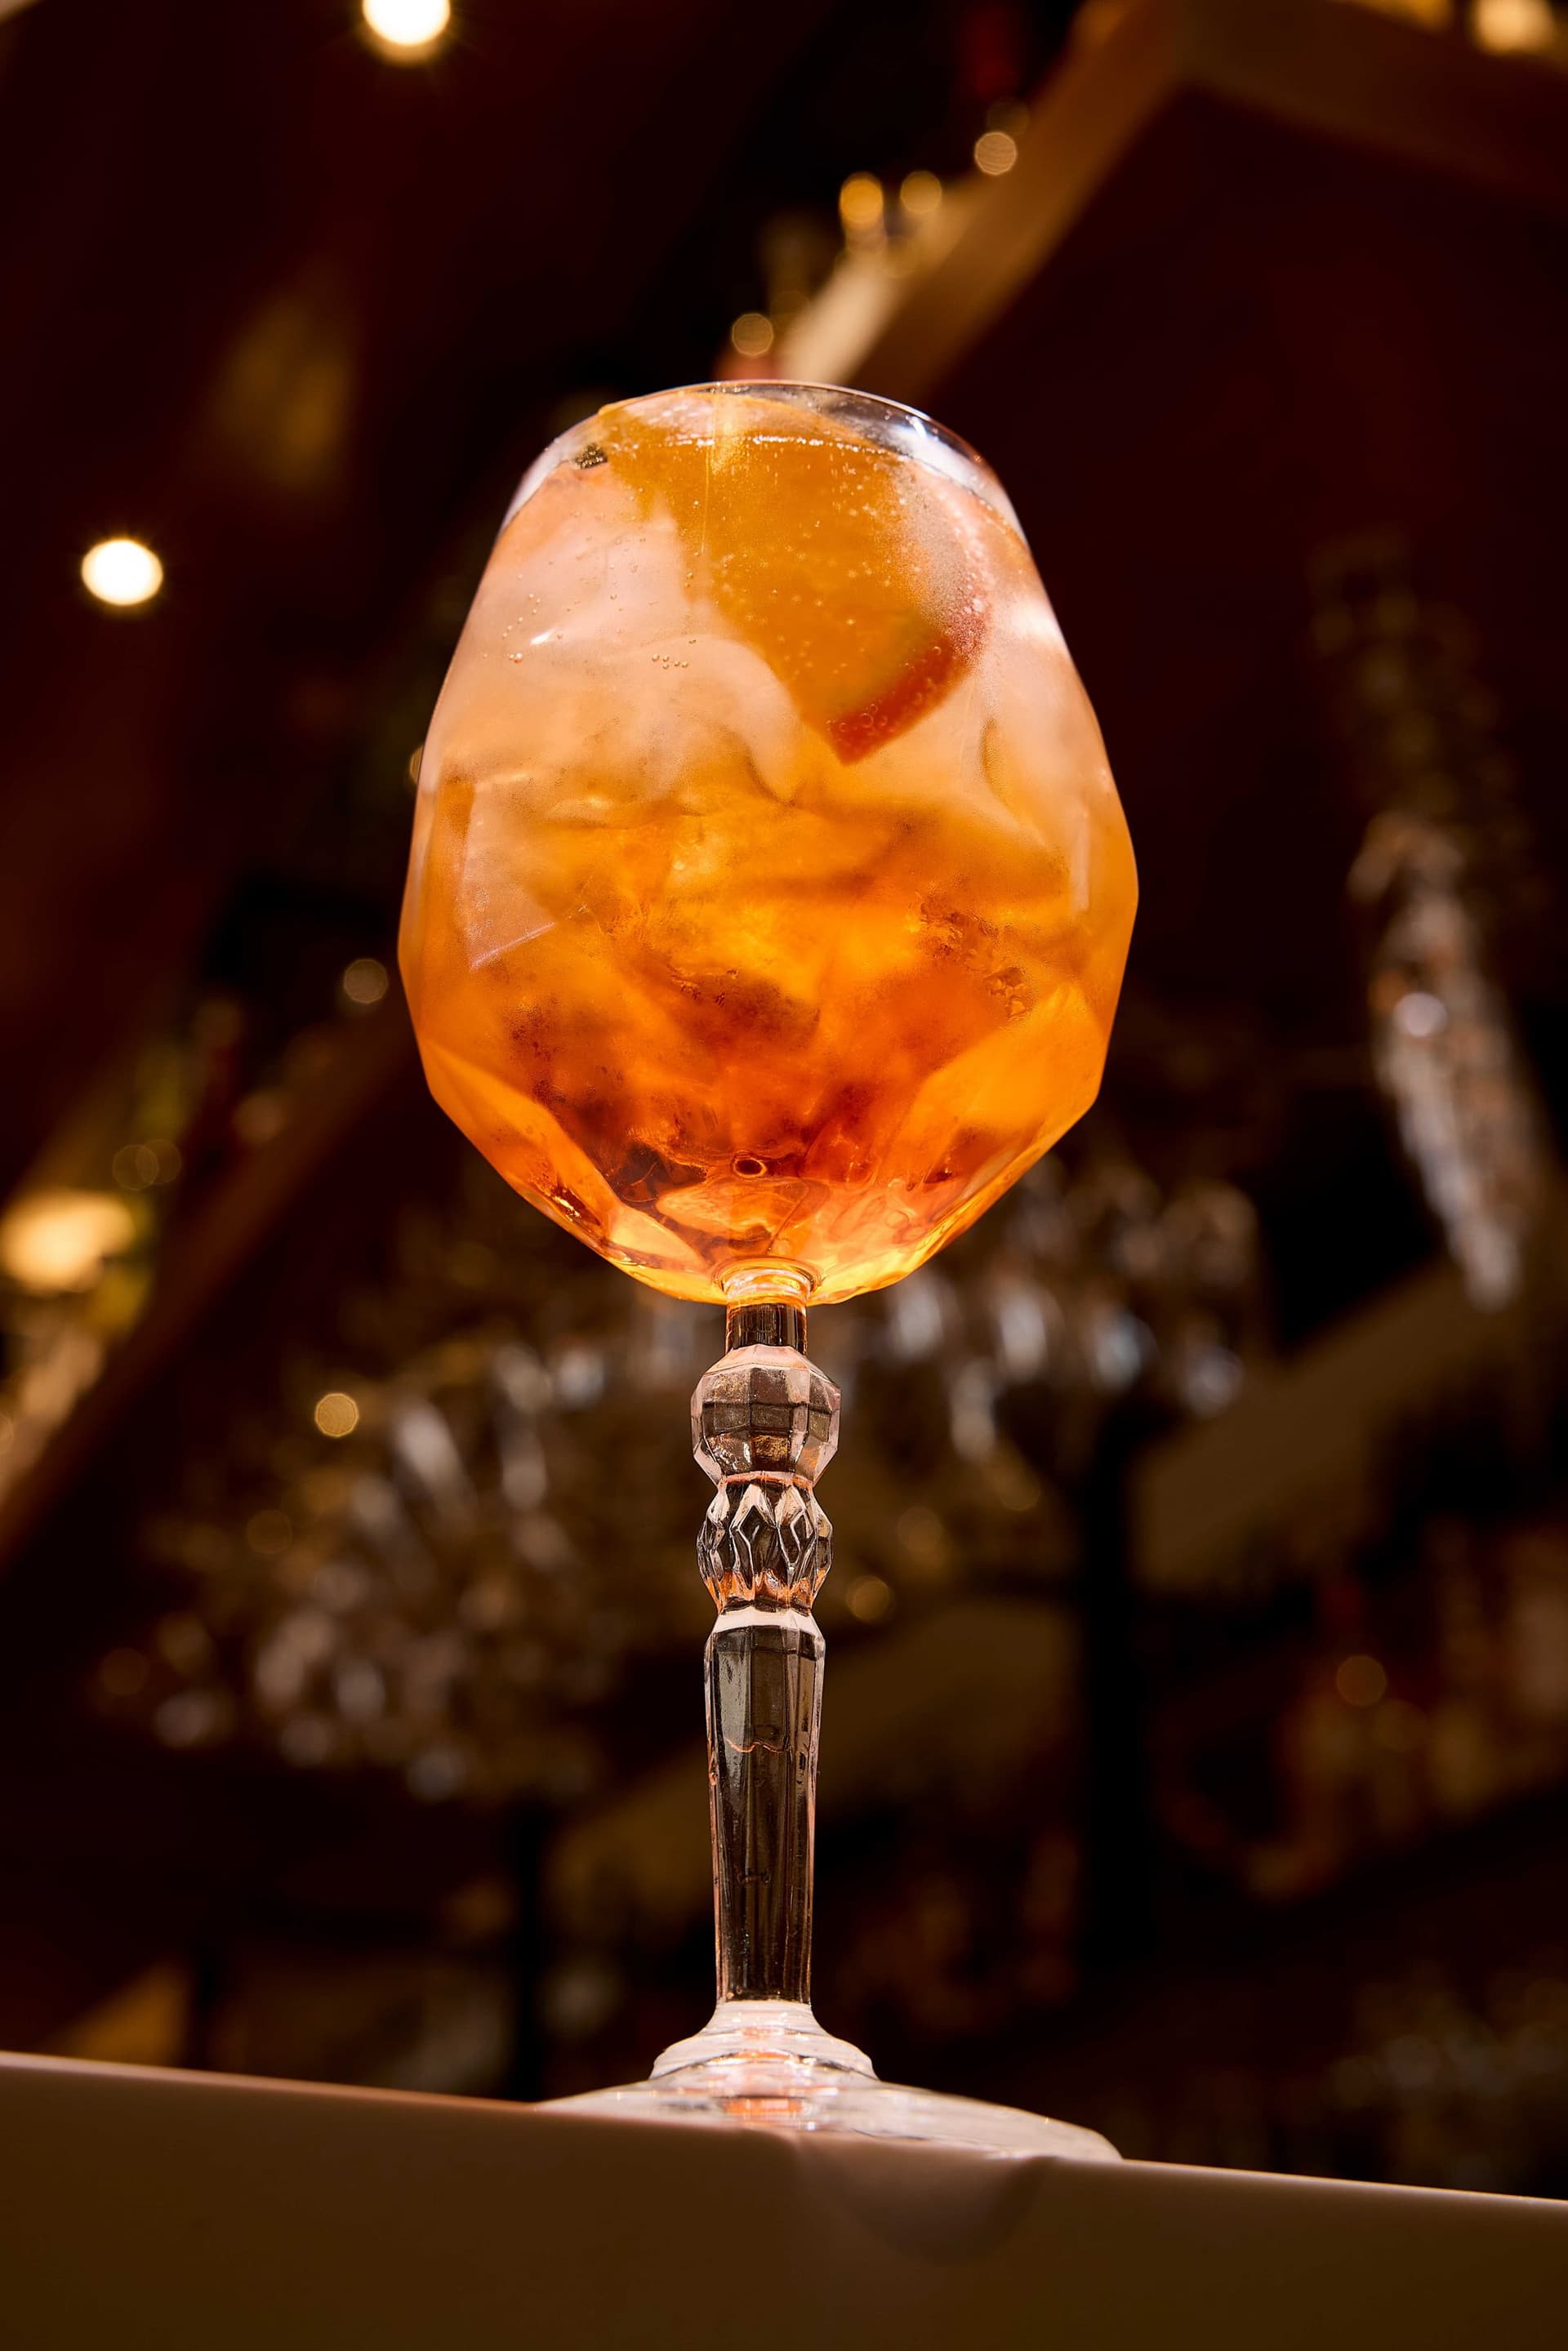
Backlighting positions the main light source behind the food, creating a halo effect and highlighting translucent elements like beverages, sauces, and fresh ingredients.
Setup: - Main light behind and slightly above the food - Diffused to avoid hotspots - Fill light or reflector in front to prevent the front of the food from going too dark
Best for: - Beverages (highlights carbonation and ice) - Fresh ingredients (makes greens glow) - Creating mood and atmosphere
This is our go-to technique for craft cocktails and cold beverages. The backlight makes the drink glow and highlights condensation on the glass.
Food Styling Tips That Make a Difference
Even with perfect lighting, poorly styled food will look unappetizing. Here are the styling principles we follow.
Less Is Often More
The biggest mistake we see from amateur food photographers is over-styling. Too many ingredients, too many props, too much going on in the frame.
The best food photography is clean and focused. Choose:
- One hero element (the burger, the cocktail, the dessert)
- One or two supporting elements (ingredients, garnishes)
- Minimal props (one plate, one napkin, maybe one utensil)
Everything else is distraction.
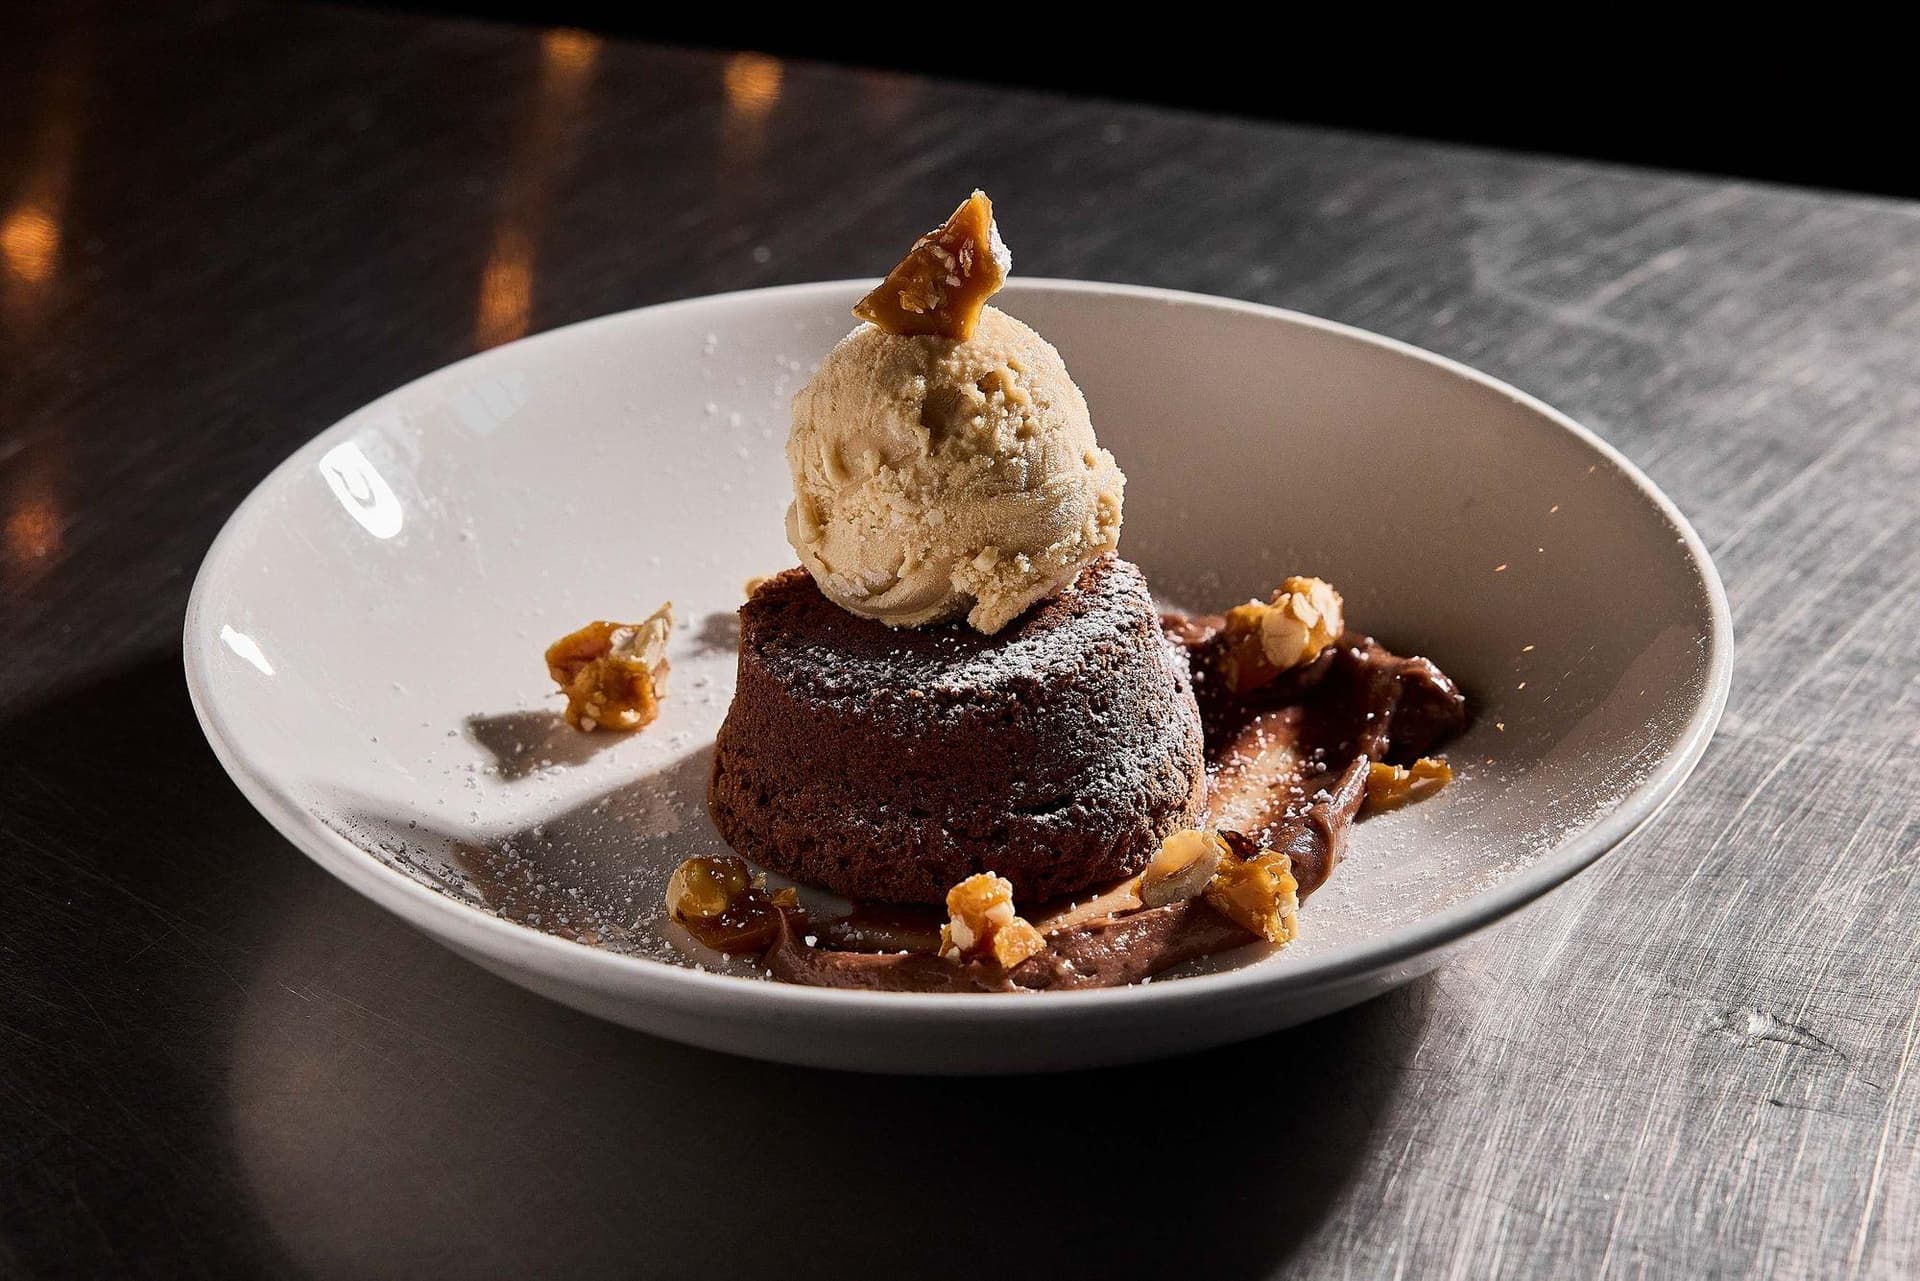
Show Texture and Layers
Texture is what makes food photography compelling. Look for opportunities to show:
- Cross-sections (a burger cut in half shows the layers)
- Steam rising from hot food
- Melting cheese or chocolate
- Crusty, flaky, or crispy surfaces
- Glisten on sauces and dressings
These details trigger sensory responses in viewers: they can almost taste the crunch or smell the freshness.
Use Fresh, Perfect Ingredients
This seems obvious, but it's worth emphasizing: every ingredient in the frame should be at peak freshness. That means:
- No wilted greens
- No bruised fruit
- No dried-out edges on meat
- No condensation where it shouldn't be
We often prepare multiple versions of the same dish and select the best elements from each. A food stylist might cook three burgers and use the best patty from one, the freshest lettuce from another, and the most perfectly toasted bun from the third.
Strategic Garnishing
Garnishes serve two purposes in food photography:
1. Add color and visual interest 2. Communicate freshness and quality
But garnishes must look natural. A sprig of rosemary placed too perfectly signals "staged." Instead:
- Let herbs fall casually
- Use torn basil instead of perfectly whole leaves
- Show a light dusting of powdered sugar rather than a heavy coating
- Include one or two small "imperfections" that make the styling feel authentic
Color Contrast and Complementary Tones
Color theory matters in food photography. You want enough contrast to make the food pop, but not so much that it looks chaotic.
We often use:
- Cool backgrounds (blue, gray, slate) for warm-toned foods (roasted meats, baked goods)
- Warm backgrounds (wood, earth tones) for fresh greens and salads
- Neutral backgrounds (white, black, concrete) when the food itself is colorful
The goal is to make the food the star while creating a cohesive, appetizing color palette.
Menu Photography for Restaurants
If you own a restaurant, your menu photography is one of your most important marketing assets. Here's how to approach it strategically.
Shoot Your Hero Dishes First
You don't need to photograph every item on your menu. Focus on:
- Signature dishes that define your brand
- High-margin items you want to promote
- Visually striking dishes that photograph well
- Seasonal specials and limited-time offers
We typically recommend restaurants start with 8-12 hero dishes and build from there.
Maintain Consistency Across the Set
All your menu photos should feel like they belong to the same brand. That means:
- Consistent lighting style
- Similar backgrounds and props
- Unified color grading in post-production
- Matching plate and presentation style
When customers browse your website or Instagram, they should immediately recognize your visual identity.
Optimize for Multiple Uses
Your menu photography should work across:
- Website: High-resolution hero images
- Social media: Square and vertical crops for Instagram
- Print menus: CMYK color mode, high DPI
- Third-party delivery apps: Specific aspect ratios for DoorDash, Uber Eats, etc.
We shoot menu photography with this in mind, leaving extra space around the hero dish so you can crop to different aspect ratios without losing the key elements.
Update Seasonally
Food photography should evolve with your menu. Seasonal updates:
- Show customers you're current and relevant
- Highlight fresh, seasonal ingredients
- Create marketing opportunities around holidays and events
- Keep your social media content fresh
We work with several Austin restaurants on quarterly photography sessions to keep their visual content aligned with seasonal menu changes.
Beverage Photography: Cocktails, Coffee, and More
Beverage photography has its own unique challenges and techniques.
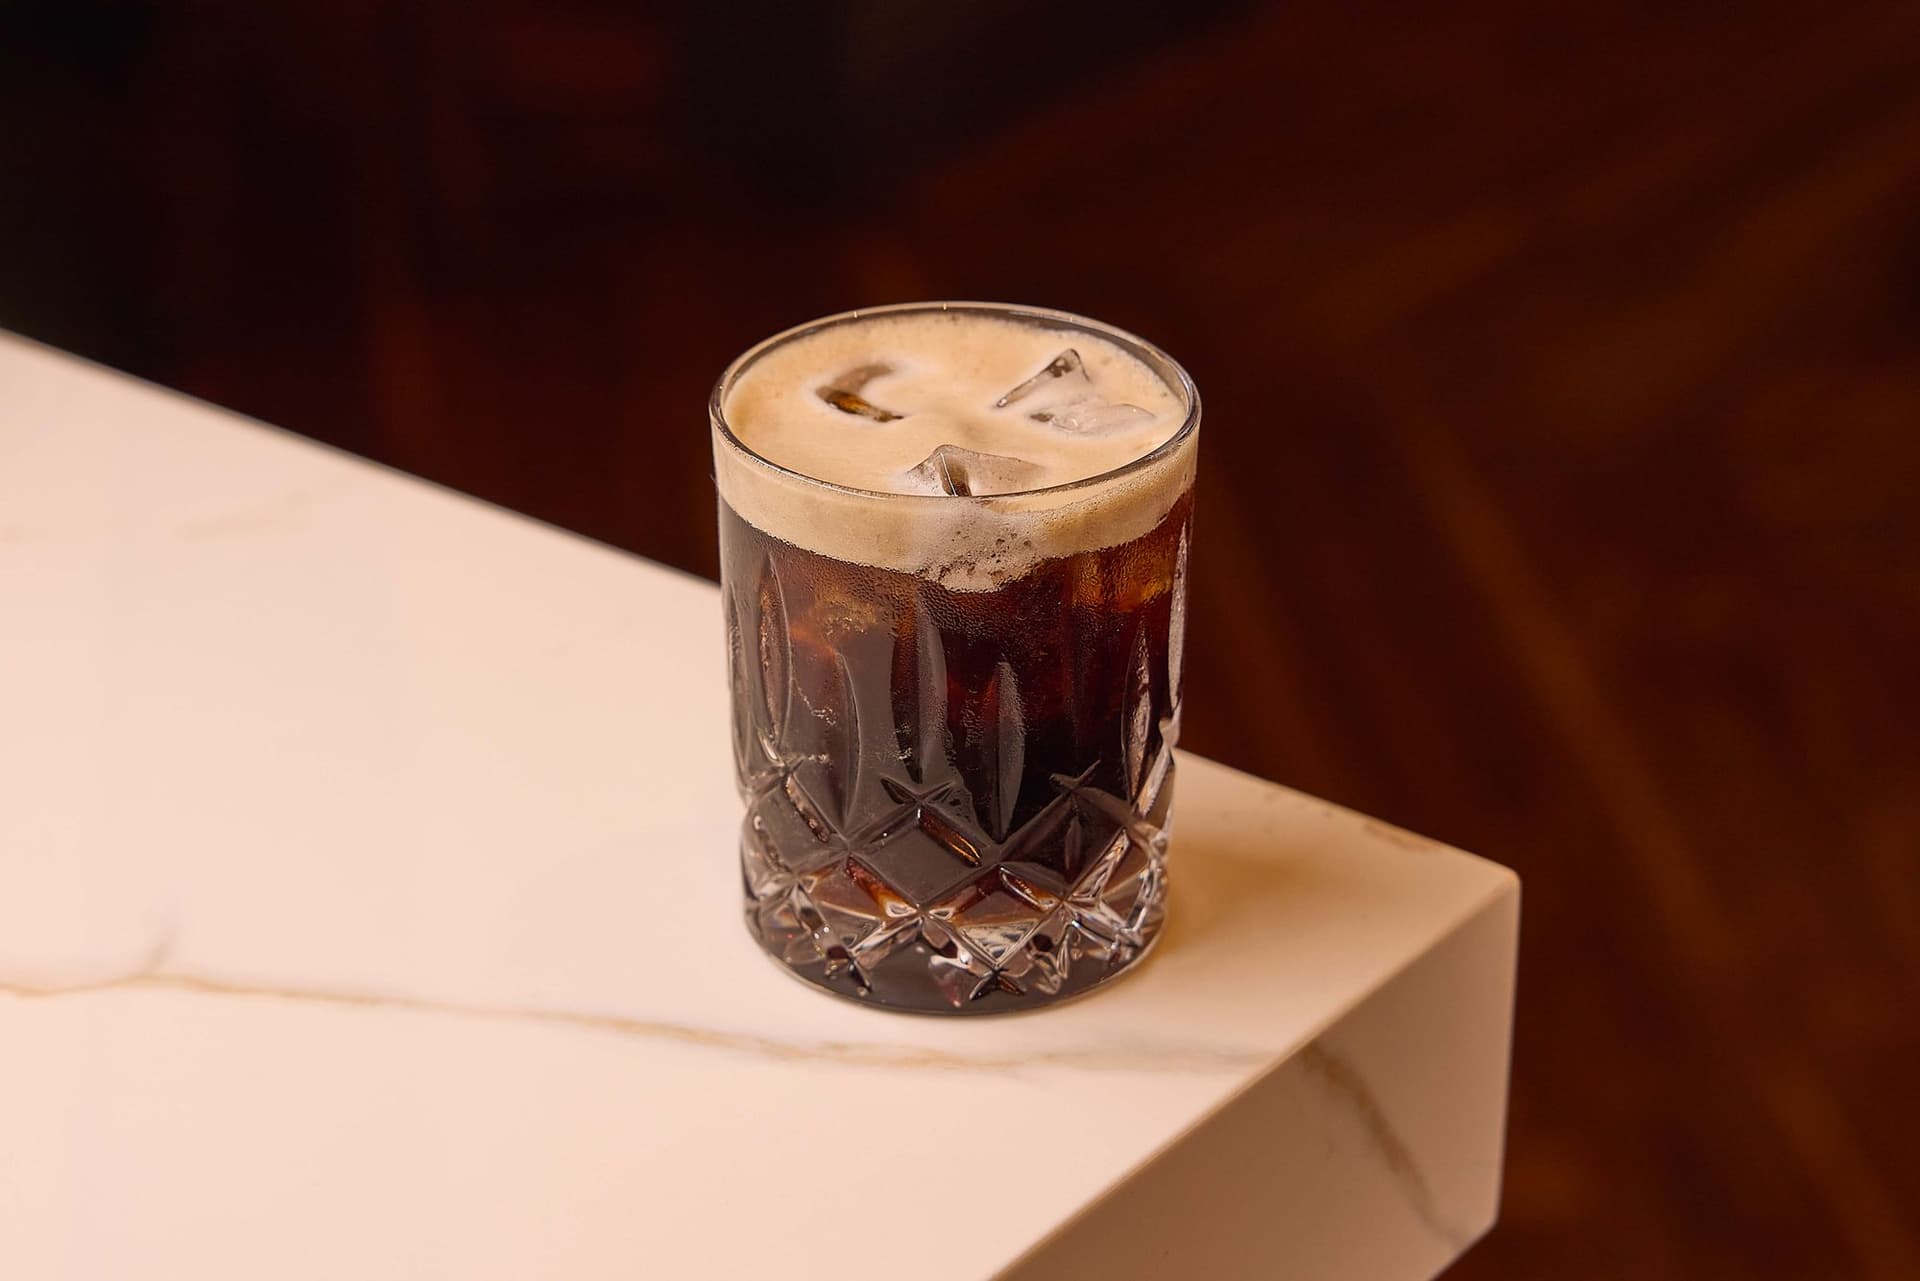
Ice and Condensation
Ice melts fast under hot lights. Condensation evaporates. You need to work quickly or use stand-ins.
Here's our workflow:
1. Build the drink with fake ice (acrylic cubes) and dial in lighting and composition 2. Take test shots and finalize camera settings 3. Build the real drink with fresh ice 4. Shoot quickly (you have 60-90 seconds before the ice starts melting visibly) 5. Use a spray bottle to add fresh condensation between shots if needed
For the "perfect" droplet effect you see in professional cocktail photography, we sometimes use glycerin mixed with water: it creates realistic-looking condensation that doesn't evaporate.
Glassware Selection
The glass is as important as the drink. Choose:
- Clean, streak-free glassware (we polish with microfiber before every shot)
- Glass that complements the drink (coupe for cocktails, mason jar for iced coffee, wine glass for wine)
- Unique or branded glassware that reinforces your identity
Backlit glass shows carbonation and clarity beautifully. Side-lit glass emphasizes color and texture.
Garnishes and Styling
Cocktail garnishes should look fresh and intentional. Common techniques:
- Citrus wheels or twists (cut fresh, placed strategically)
- Fresh herbs (mint, rosemary, basil)
- Edible flowers for upscale presentations
- Dehydrated fruit for shelf-stable garnishes
For coffee photography, latte art is your hero element. Make sure the milk is fresh and the art is crisp: reshoot if it's sloppy.
Social Media Content for Food and Beverage Brands
Social media is where most food photography lives in 2026. Here's how to create content that performs.
Vertical Format Is King
Instagram, TikTok, Facebook, and Pinterest all prioritize vertical content. Shoot:
- 4:5 ratio for Instagram feed
- 9:16 ratio for Stories and Reels
- Consider shooting vertical from the start rather than cropping later
We often shoot with the camera in portrait orientation to maximize vertical real estate.
Behind-the-Scenes Content Performs
Don't just show the finished dish: show the process. Behind-the-scenes content:
- Feels more authentic and relatable
- Gives customers a reason to follow you (they're seeing something exclusive)
- Works great for video content (Reels, TikToks, Stories)
Examples: pouring a latte, plating a dish, flambéing a dessert, mixing a cocktail.
User-Generated Content Inspiration
Your best customers are creating content about your food every day. UGC (user-generated content) is:
- More trustworthy than branded content
- Free marketing
- A signal that your food photographs well in real-world conditions
Encourage customers to tag you, then reshare the best content (with permission). We help brands create visual guidelines so even amateur photos align with their brand aesthetic.
Consistent Posting and Visual Identity
Social media success comes from consistency. Develop a visual style and stick to it:
- Same color grading and filters
- Similar angles and compositions
- Consistent use of props and backgrounds
- Unified lighting style
When customers scroll your feed, they should see a cohesive brand story, not a random collection of food photos.
Seasonal Campaigns and Limited-Time Offers
Seasonal food photography is a huge opportunity for restaurants and food brands.
Holiday-Themed Content
Plan your photography around major food holidays and seasons:
- Summer: Grilling, fresh salads, cold beverages, outdoor dining
- Fall: Pumpkin, warm spices, comfort food, harvest themes
- Winter: Hot drinks, hearty meals, holiday parties, cozy settings
- Spring: Fresh ingredients, light dishes, pastel colors, renewal themes
Seasonal photography gives you a reason to create new content and promote specific menu items.
Limited-Time Offers (LTOs)
When you launch a seasonal menu or LTO, photography should be part of the strategy. We work with brands to:
- Shoot new items before launch
- Create teaser content for social media
- Develop full marketing assets (email, website, print)
- Build a content calendar around the launch
The photography should feel special and timely: this is not your everyday content.
AI Tools for Food and Beverage Photography
AI is starting to make inroads in food photography, though it's less mature than other product categories. Here's what works (and what doesn't) in 2026.
Background Replacement
AI background removal works great for food photography. You can:
- Shoot on a neutral surface and swap backgrounds later
- Create seasonal variations from one base image
- Test different color palettes and moods
This is especially useful for e-commerce food brands that need product shots on pure white backgrounds for marketplaces like Amazon.
Lighting and Color Correction
AI-powered editing tools can:
- Enhance colors to make food more vibrant
- Adjust white balance for accurate tones
- Brighten shadows without losing detail
- Add or modify highlights for extra dimension
We use AI as part of our post-production workflow, but it's a tool to enhance real photography: not a replacement for good lighting.
Scene Generation (Use with Caution)
AI can composite your food product into lifestyle scenes (a dining table, an outdoor picnic, a coffee shop setting). This works better for packaged food products than plated dishes.
The key limitation: AI-generated food itself still looks artificial. You can composite a real photo of your product into an AI scene, but asking AI to generate the food from scratch will look uncanny.
Why Professional Food Photography Is Worth the Investment
Food photography is one area where DIY rarely delivers professional results. Here's why working with a specialist makes sense.
Speed and Efficiency
Professional food photographers work fast. We know how to:
- Set up lighting in minutes
- Style food quickly before it degrades
- Capture the shot in a narrow window of peak freshness
- Deliver consistent results across dozens of dishes in one session
Time is money in the restaurant business, and we maximize your ROI by working efficiently.
Technical Expertise
Food photography requires specialized knowledge:
- Lighting for reflective surfaces and translucent liquids
- Color accuracy for appetizing tones
- Macro photography for detail shots
- Styling techniques that enhance without looking fake
We've spent years refining these skills so you don't have to.
Marketing and Brand Strategy
We don't just take pretty pictures: we think about how the photography supports your business goals:
- What dishes should you highlight to drive revenue?
- What visual style aligns with your brand positioning?
- How can you reuse these assets across multiple channels?
- What seasonal content will keep your marketing fresh?
Photography is part of your larger marketing strategy, and we help you think holistically about visual content.
Ready to Create Food and Beverage Photography That Sells?
Whether you're a restaurant building your visual brand, a food product launching on retail shelves, or a beverage company creating social media content, your photography is one of your most important marketing assets.
Great food photography doesn't just look good: it drives business. It makes customers hungry, builds trust in your brand, and gives them a reason to choose you over competitors.
At 51st & Eighth, we specialize in food and beverage photography for brands that take their visual identity seriously. Based in Austin, Texas, we work with local restaurants, national food brands, and everyone in between. We combine traditional food styling and photography expertise with cutting-edge AI tools to deliver images that convert: on your website, social media, menus, and everywhere else customers find you.
We've worked with Austin favorites like Zanti and helped them create mouth-watering content for seasonal campaigns, social media, and menu updates. We know how to make food look as good as it tastes.
Ready to upgrade your food and beverage photography? Visit our services page to see our packages, or reach out to discuss your specific needs. We'd love to help you create images that make customers crave your food.
Frequently Asked Questions
How long does a restaurant menu photography session take? A focused session photographing 8–12 hero dishes typically takes 4–6 hours including lighting setup, styling, and shooting. Plan for 20–30 minutes per dish: time for styling, test shots, multiple angles, and a quick reset before the next setup. Full menu shoots (30+ items) require full days and ideally split across two sessions to maintain energy and food quality.
Do I need a professional food stylist, or can the chef plate the food? For hero and marketing photography, a professional food stylist is worth the investment ($400–800/day). They know which techniques photograph well vs. look good in person, and they work fast before food degrades. For routine social media content and iPhone shots, your chef can absolutely plate for camera: just ensure consistent portions, clean plating, and good natural light.
How should I prepare for a food photography session? Prep 2–3 versions of each dish (ingredients go wrong, food wilts). Have all props and surfaces cleaned and staged before the food is plated. Shoot during daylight hours to maximize window light options. Have the photographer visit your space 30 minutes early to scout light and set up before anything is cooked. Send a detailed shot list covering angles, props, and intended use for each dish.
Can I use food photography for both print menus and social media? Yes, with planning. Shoot in high resolution (minimum 300dpi) for print, and make sure you have both horizontal and vertical crops of each hero dish for platform versatility. Tell your photographer upfront that you need both print and digital use: this affects how they frame shots, ensuring there's sufficient negative space in some images for text overlays and menu layouts.
Ready to elevate your food and beverage photography?
Get a free quote from Austin's leading food and beverage photography studio.
Get a Free Quote →